
Your first server
After this page you have a Minecraft Bedrock server with LeviLamina and one mod, running on your computer. You get there from an empty folder, in the interface of lip, without typing a single command but lip itself.
It takes about ten minutes, most of it waiting for downloads.
What you need
lip, installed: see Installation.lip -vmust print a version.- A terminal window. The pictures below are 100 columns wide and 28 rows high; anything from 80 columns works well.
- An internet connection.
lipdownloads the game from Minecraft, and LeviLamina and the mods from GitHub.
How to read the pictures
Every picture shows what lip really displays at that step. The orange marks are added for this page: boxes and numbered circles point at what the text talks about, and the keys under a picture are the ones to press next.
Start lip
-
Make a folder to keep your servers in, go into it, and start
lip. The folder can be anywhere; this page usesD:\servers.Windowsmkdir D:\servers cd D:\servers lipLinux and macOSmkdir -p ~/servers cd ~/servers liplipfills the terminal with its interface and shows the Home page.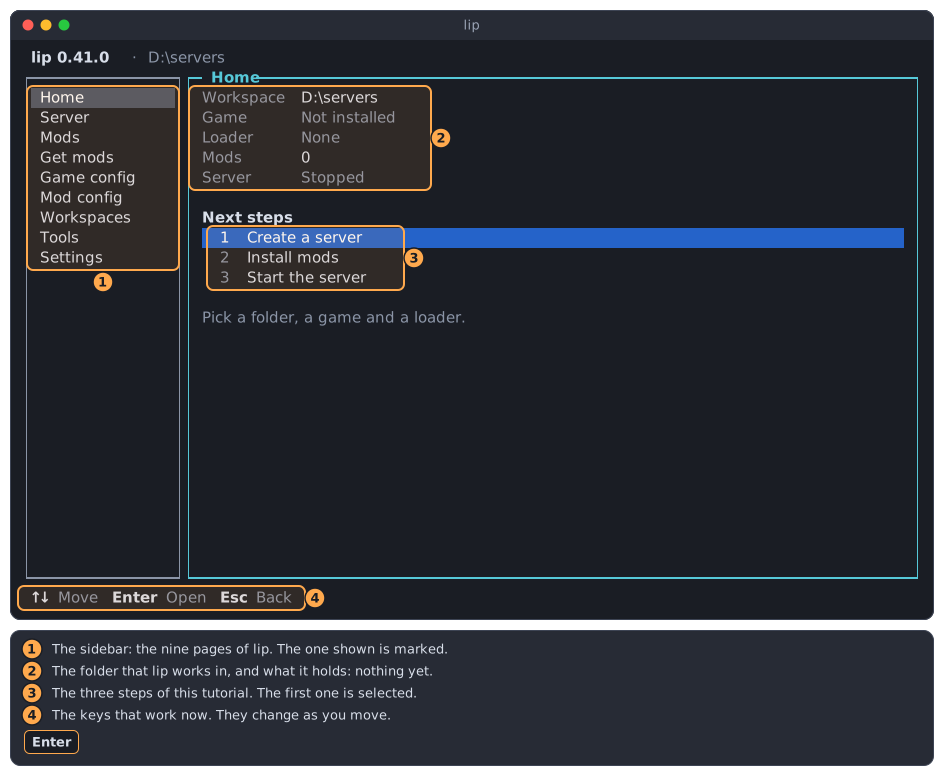
- (1) The sidebar lists the nine pages of
lip. The one that is shown is marked. - (2) The overview says which folder
lipworks in and what it holds. There is nothing yet: no game, no loader, no mods. - (3) Next steps are the three things this page does with you: Create a server, Install mods, Start the server.
- (4) The bottom line always lists the keys that work right now.
You only need a few keys:
↑and↓move,Enteropens or confirms, andEscgoes back. There are no letter shortcuts to remember. - (1) The sidebar lists the nine pages of
If lip says "GitHub unreachable"
When lip starts, it checks whether it can reach GitHub, because LeviLamina and the mods come from there. If it cannot, it asks you what to do:
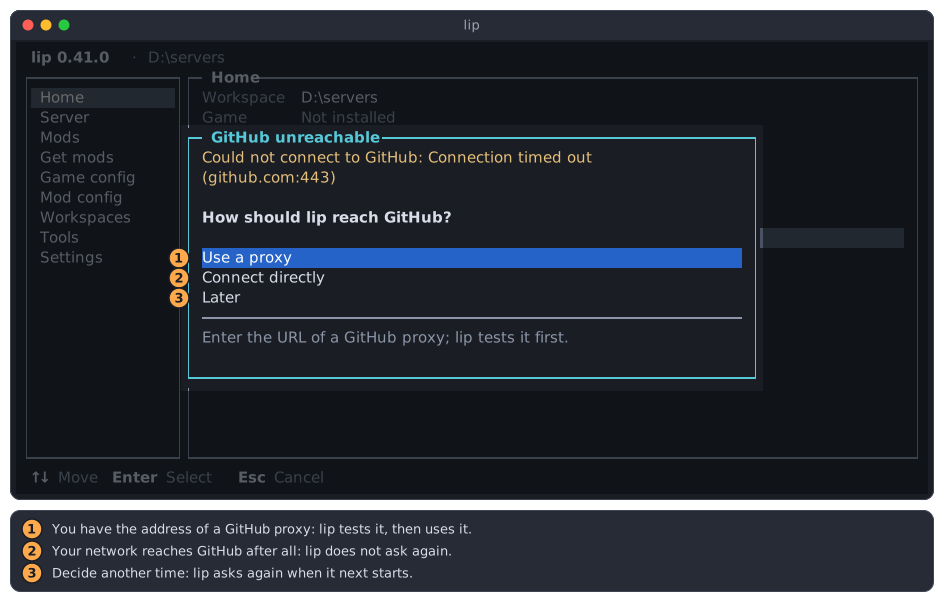
- (1) Use a proxy: choose this if you have the address of a GitHub proxy.
lipasks for it, tests it, and uses it from then on. - (2) Connect directly: choose this if your network reaches GitHub after all, for example because the connection was down for a moment.
lipdoes not ask again. - (3) Later:
lipchanges nothing and asks again the next time it starts.Escdoes the same.
Without a way to GitHub, lip cannot download LeviLamina or the mods. You can change your answer at any time on the Settings page; see Settings.
Create the server
-
On the Home page, Create a server is selected. Press
Enter.lipasks where the server goes. This folder puts it right intoD:\servers. Each server needs a folder of its own, so choose Another folder… instead: press↓, thenEnter.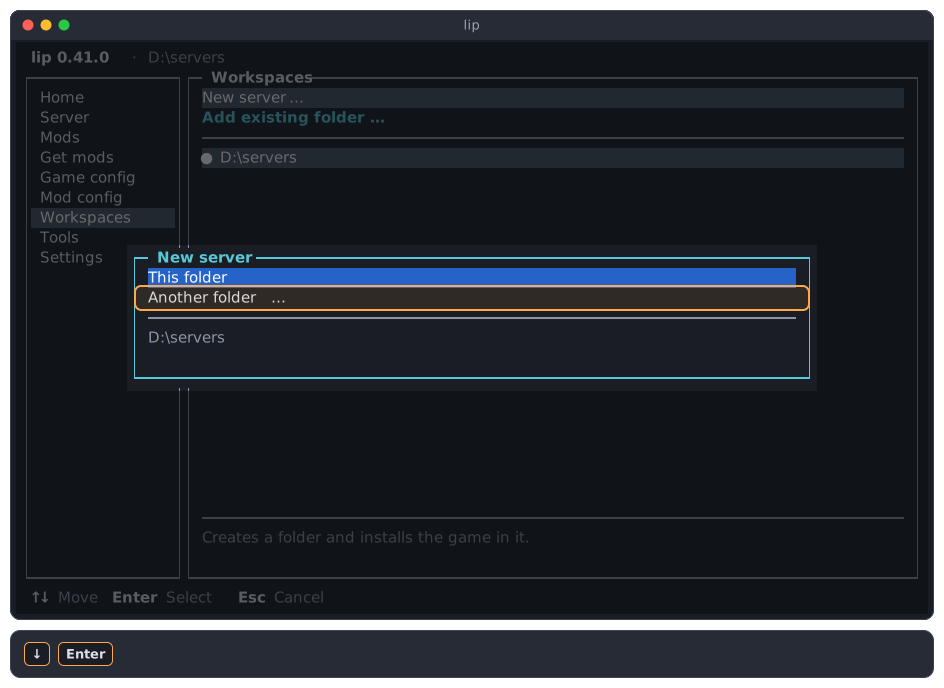
TIP
If you started
lipinside an empty folder that is meant for this one server, choose This folder and go on at step 5. -
The folder browser opens. It shows (1) the folder that is open,
D:\servers, and (2) what is in it: nothing but.., which leads one folder up.Make a folder for the server here: press
Tabto go to the buttons,→to go to New folder… (3), andEnter.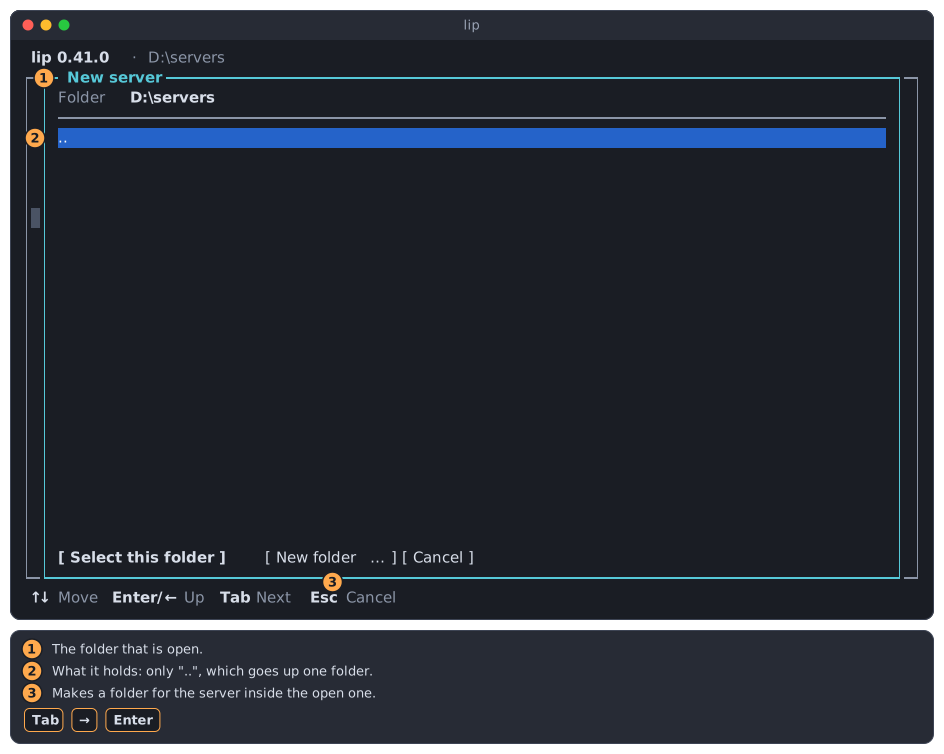
-
Type a name for the folder, such as
survival, and pressEnter.lipcreatesD:\servers\survivaland takes it as the folder of the server.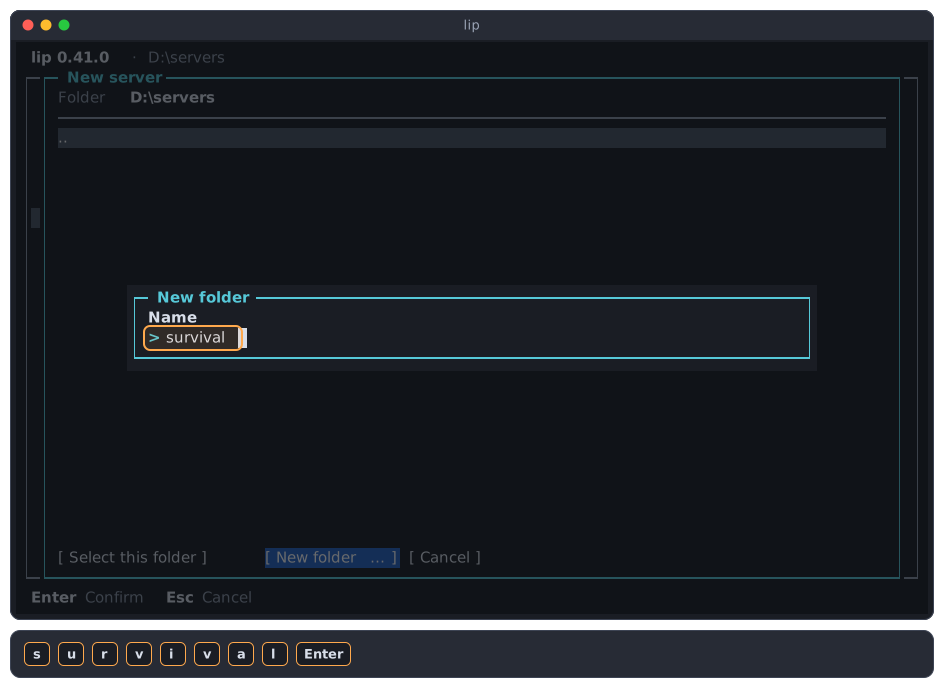
-
Choose the Game version.
liplists the versions of the Bedrock Dedicated Server, the newest first.- (1) LeviLamina ✓ means that LeviLamina supports this version, so mods work on it.
- (2) No LeviLamina means that only a plain server without mods is possible with this version.
Select the newest version that says LeviLamina ✓, which is usually the first row, and press
Enter.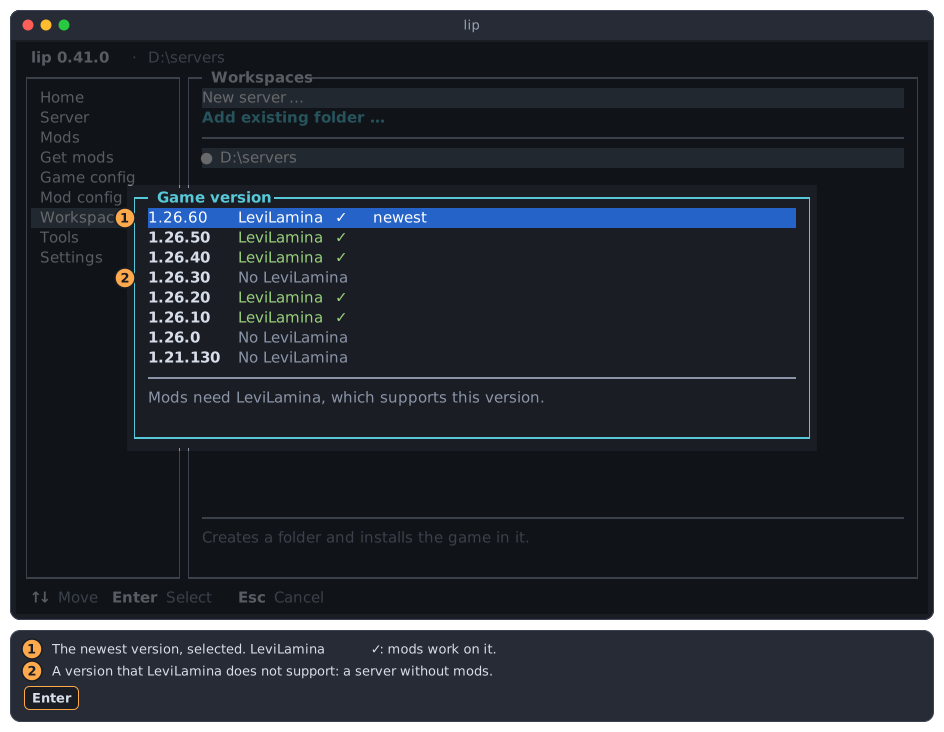
On Linux
On Linux on x64,
lipnext asks for the Build. Choose windows: it is the one that supports LeviLamina and its mods, andlipruns it through Wine. See Linux and macOS. -
Choose the Loader. The loader is what lets the server run mods. Keep the newest LeviLamina and press
Enter.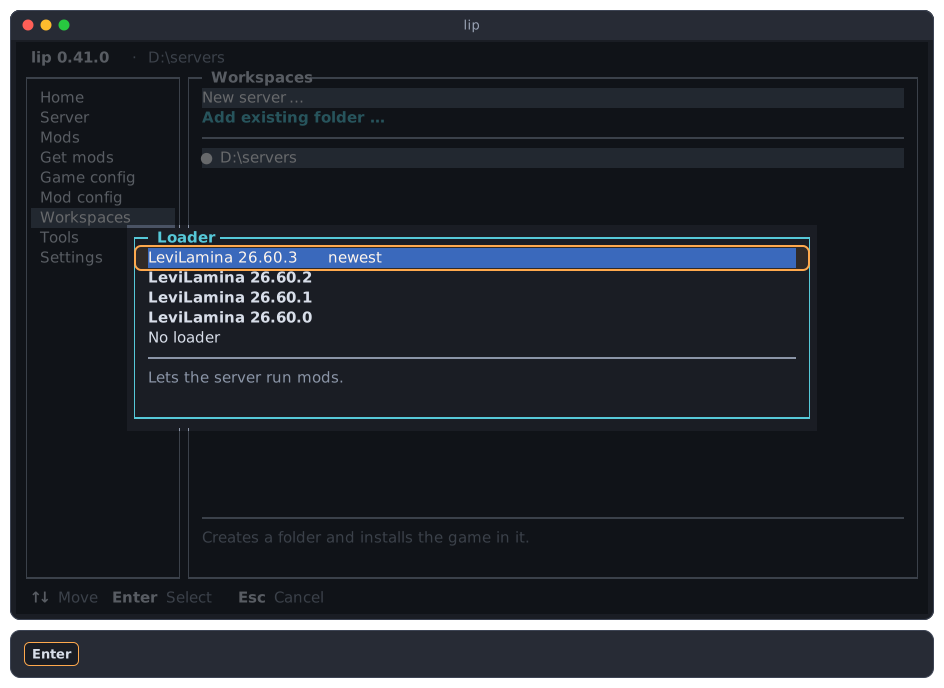
-
lipshows its plan before it changes anything. Read it:- (1) The lines that start with
Dry run:say whatlipwould install: the game (bds) and LeviLamina. They are in English in every language, because they are what the commandlip setupsays. - (2) Apply carries the plan out. Cancel and
Escleave everything as it is.
Press
Enterto apply.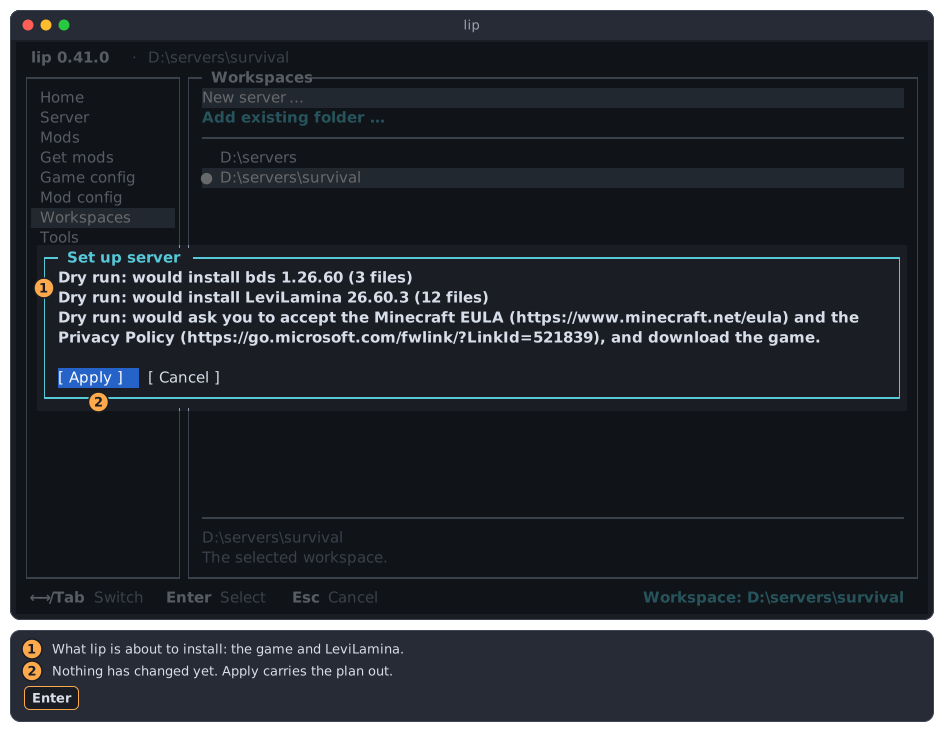
Every change that
lipmakes to a server goes this way: first the plan, then your Apply. - (1) The lines that start with
-
The Minecraft server is under the Minecraft End User License Agreement and the Microsoft Privacy Policy. Read them at the two addresses shown. To accept them and go on, press
Enteron Accept.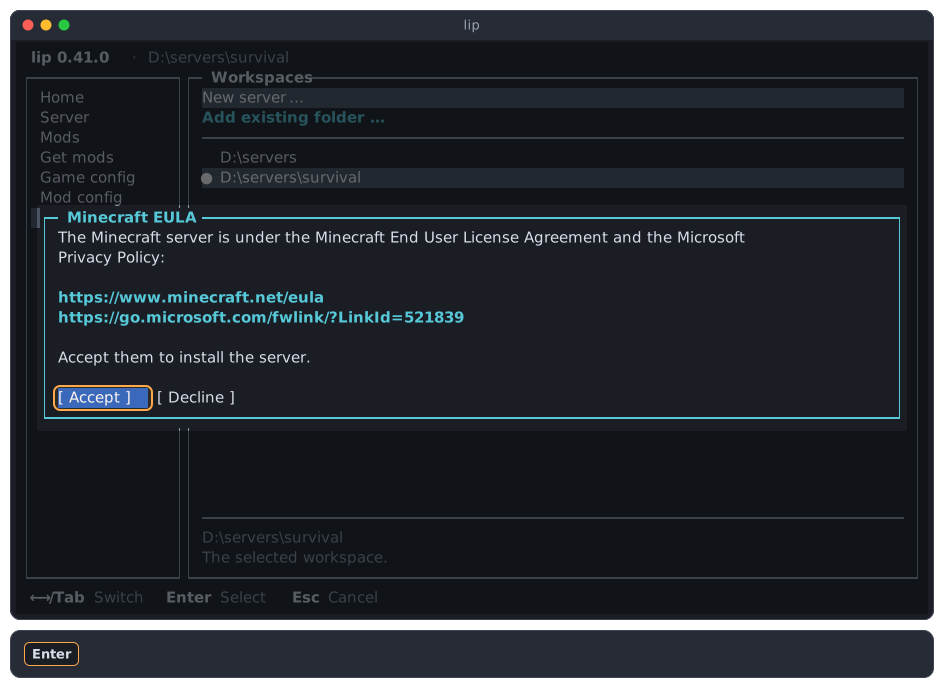
lipasks this each time it installs a game. If you decline, nothing is installed. -
lipdownloads and installs. Wait until both lines are done.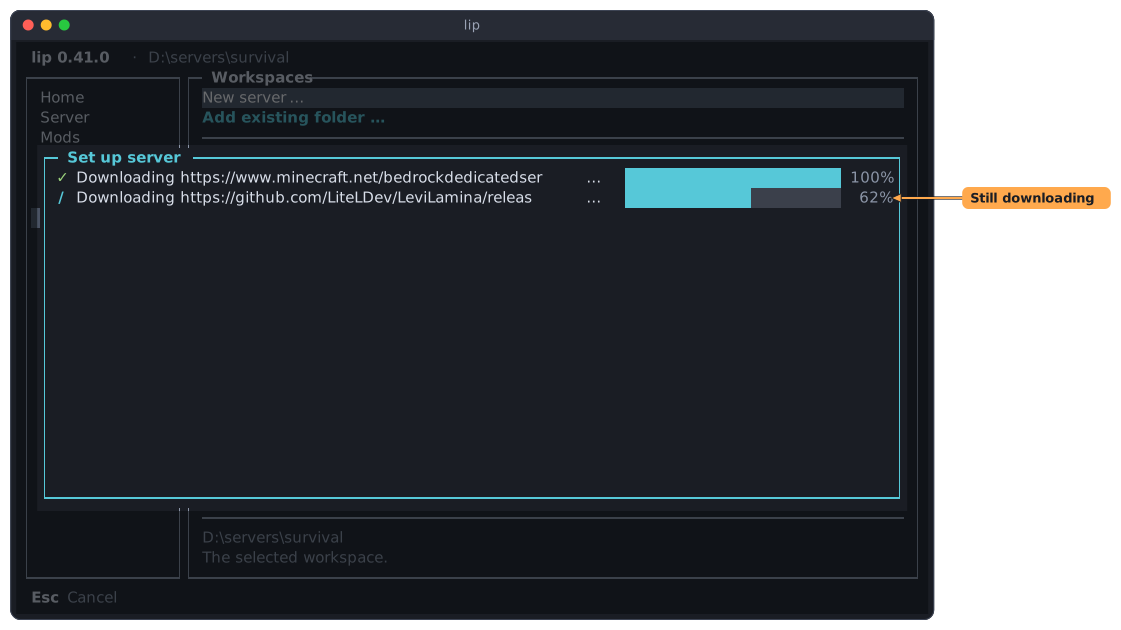
The first time,
lipmay also install what the server needs of your system:- On Windows, the Microsoft Visual C++ Redistributable. Windows asks you to allow its installer to make changes.
- On Linux and macOS, Wine. The download is large, and
lipkeeps it for all your servers.
Esccancels.lipthen undoes what it had changed so far. -
When you see ✓ Done., the server is installed. Press
Enterto close the dialog.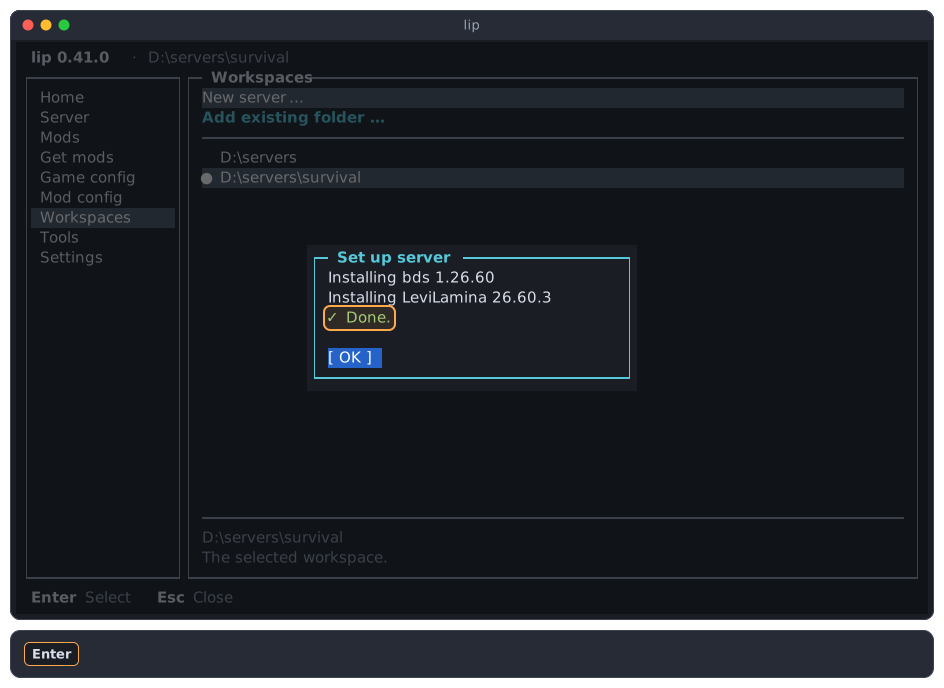
-
You are now on the Workspaces page. A workspace is a folder that holds a server.
- (1) The new server is in the list. The ● marks the workspace that
lipworks in now. - (2) The top line always names that workspace, on every page.
Go back to the Home page: press
Escto move to the sidebar,↑six times to reach Home, andEnter.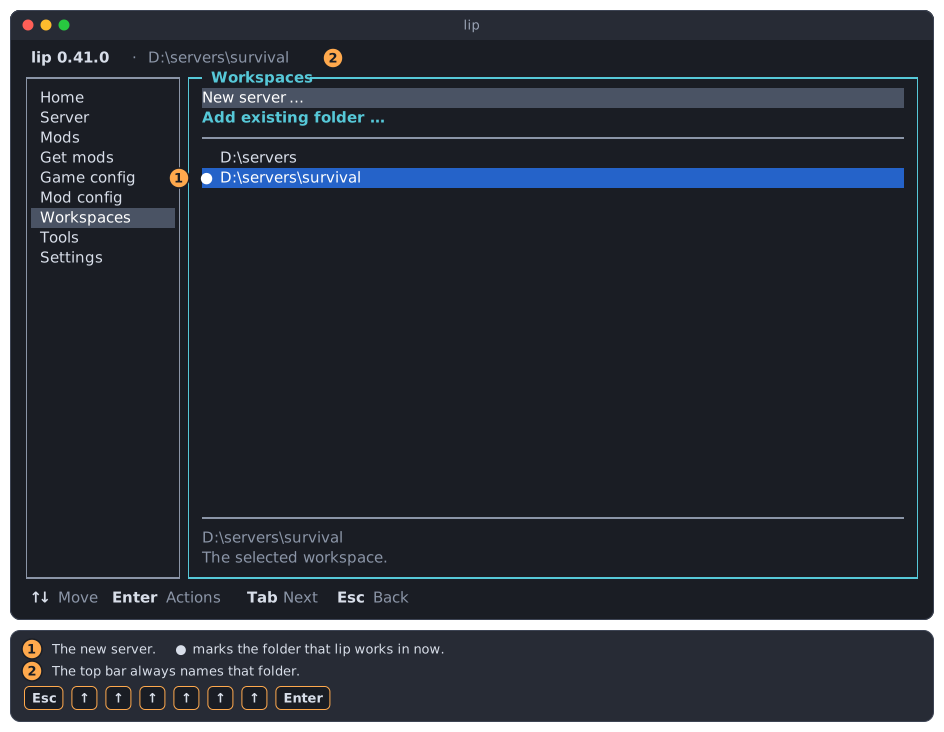
- (1) The new server is in the list. The ● marks the workspace that
Install a mod
-
The Home page has changed: (1) the overview names the game and the loader, and (2) the first step is ticked and Install mods is selected. Press
Enter.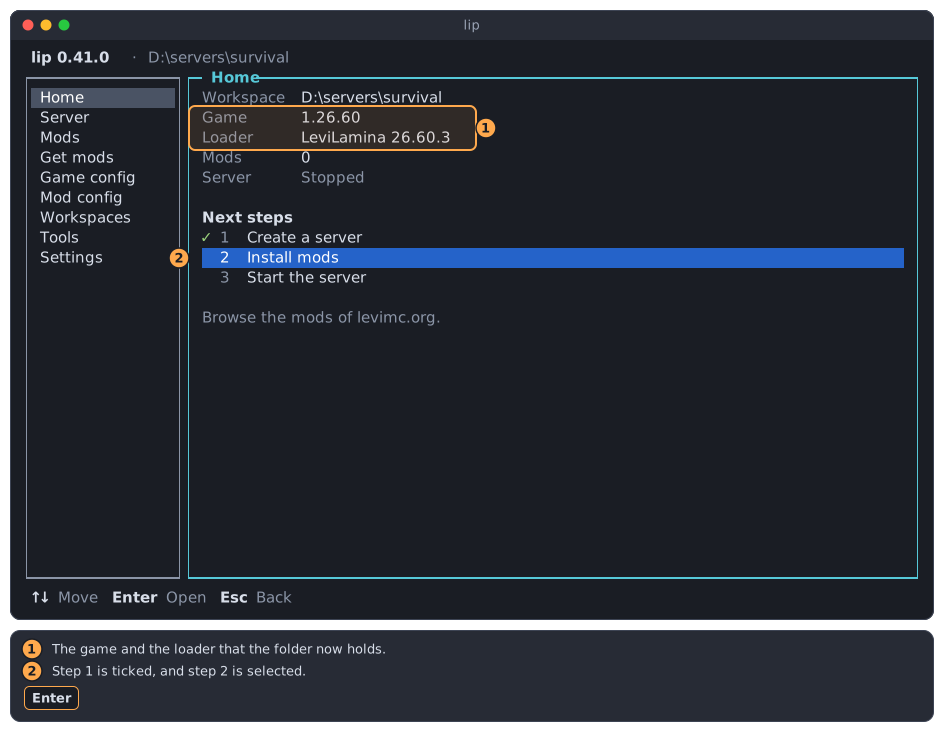
-
This is the Get mods page. It shows the mods of levimc.org.
- (1) At the top you search, sort and filter.
- (2) The list shows each mod with its author, its downloads, its stars and the date of its last update.
- (3) Below the list are the details of the mod that is selected.
This page installs LeviOptimize, a mod that makes the server run faster. Search for it: press
↑three times to go from the list up to Search.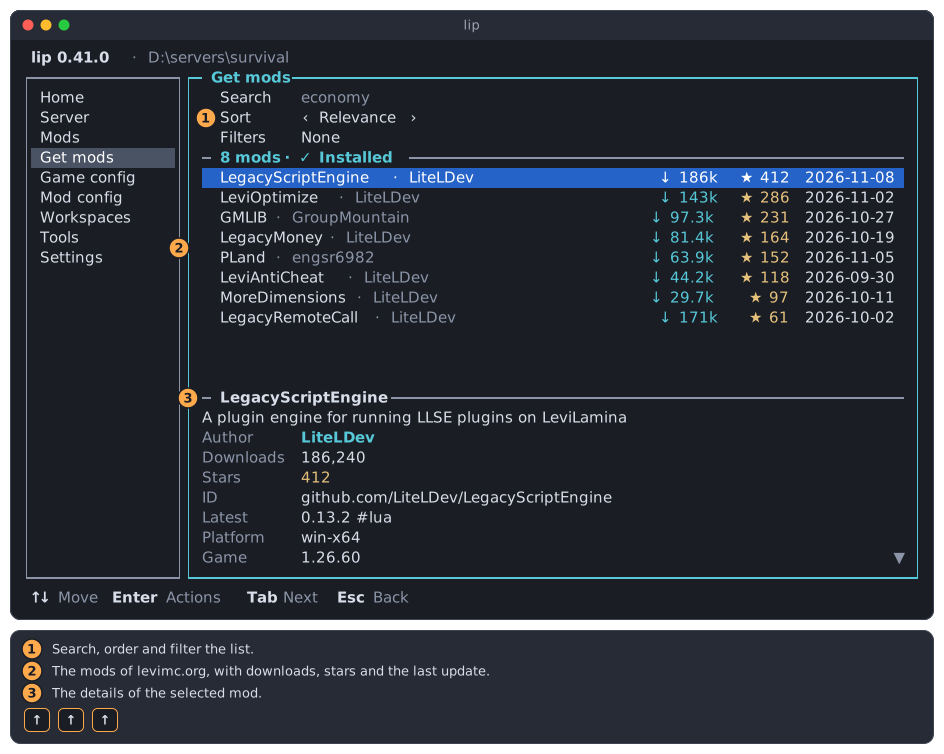
-
Type
optim. The list shrinks as you type, until only LeviOptimize is left. PressEnterto go to the results.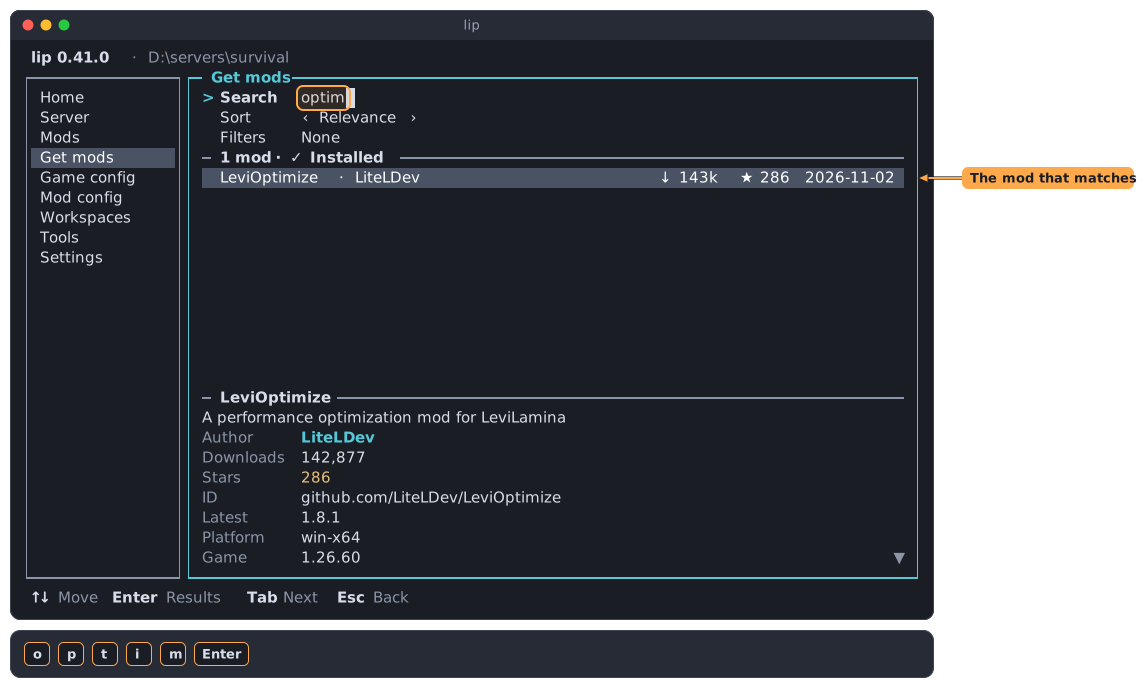
-
LeviOptimize is selected. Press
Enterto open what you can do with it, thenEnteragain on Install….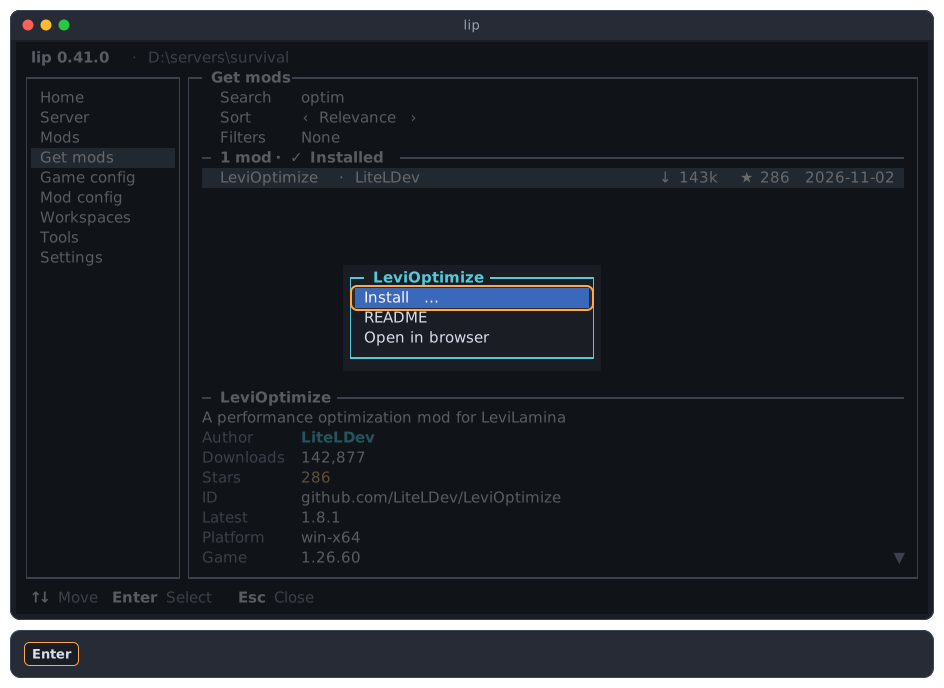
README shows the description that the author wrote, which is worth reading before you install a mod you do not know.
-
Choose the version.
- (1)
liplists only the versions that fit your game and your LeviLamina, the newest first. - (2) The last line shows what
lipis going to install.
Keep the newest version and press
Enter.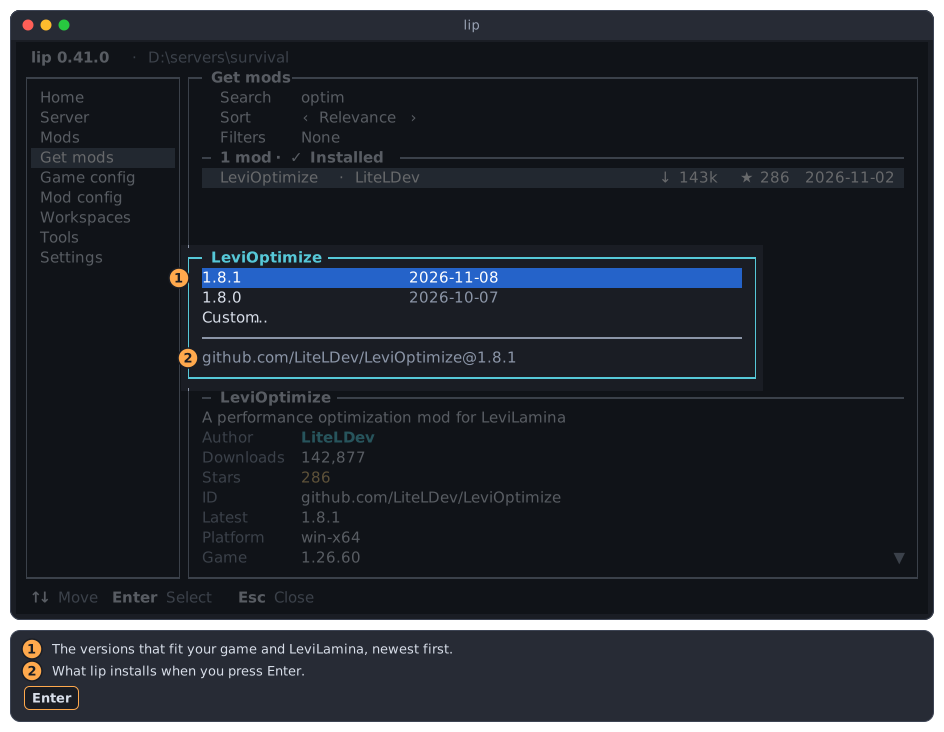
- (1)
-
Again
lipshows its plan first: it would install LeviOptimize 1.8.1, and create the foldermods/that mods live in. If a mod needs other mods, they are listed here too. PressEnteron Apply.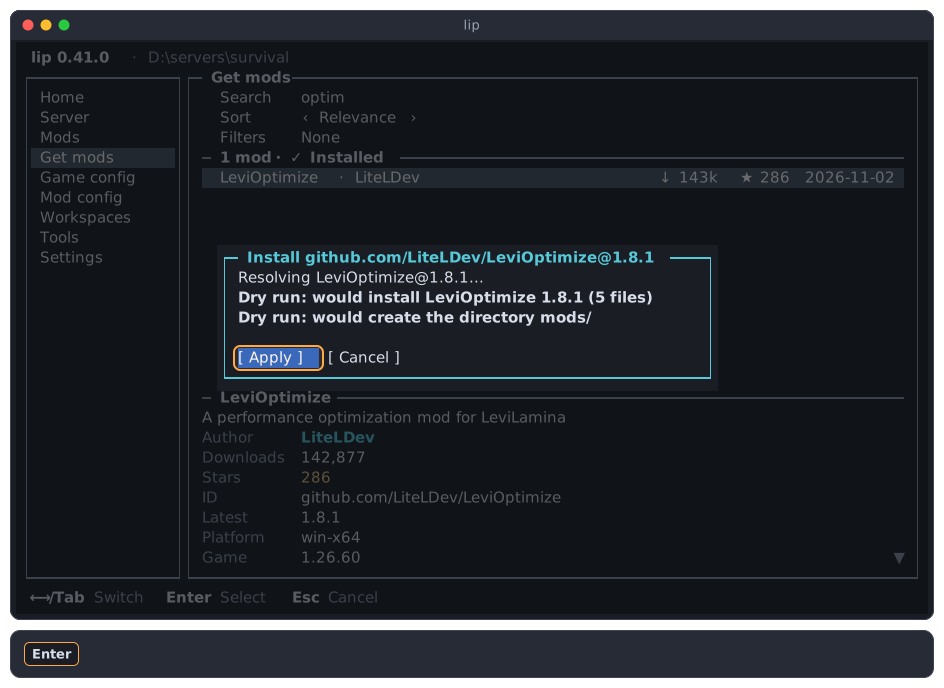
-
When you see ✓ Done., the mod is installed. Press
Enter.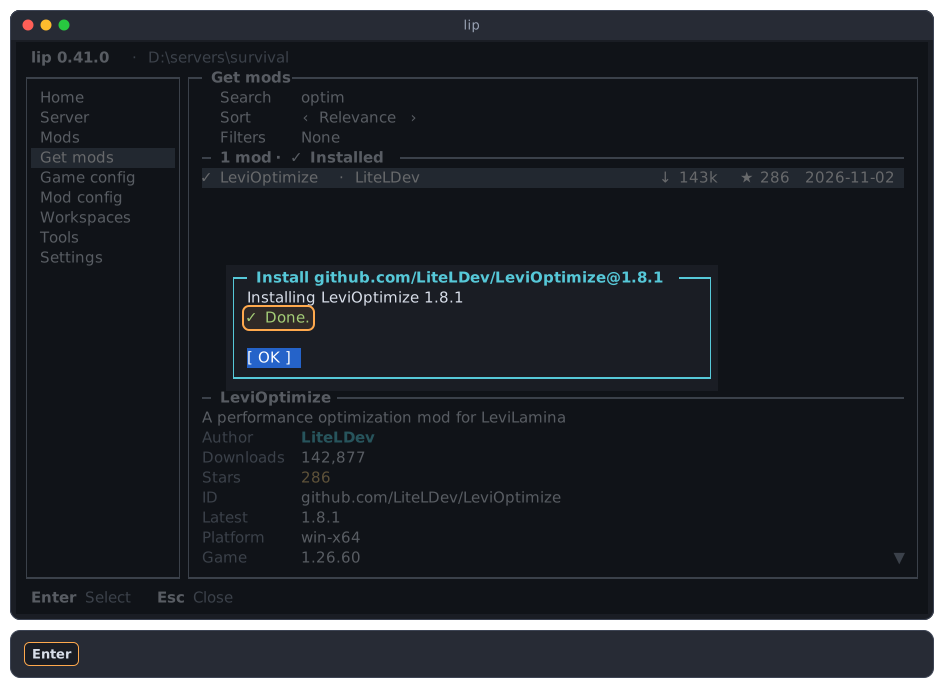
-
In the list, LeviOptimize now has a ✓: it is installed.
Go back to the Home page: press
Escto move to the sidebar,↑three times, andEnter.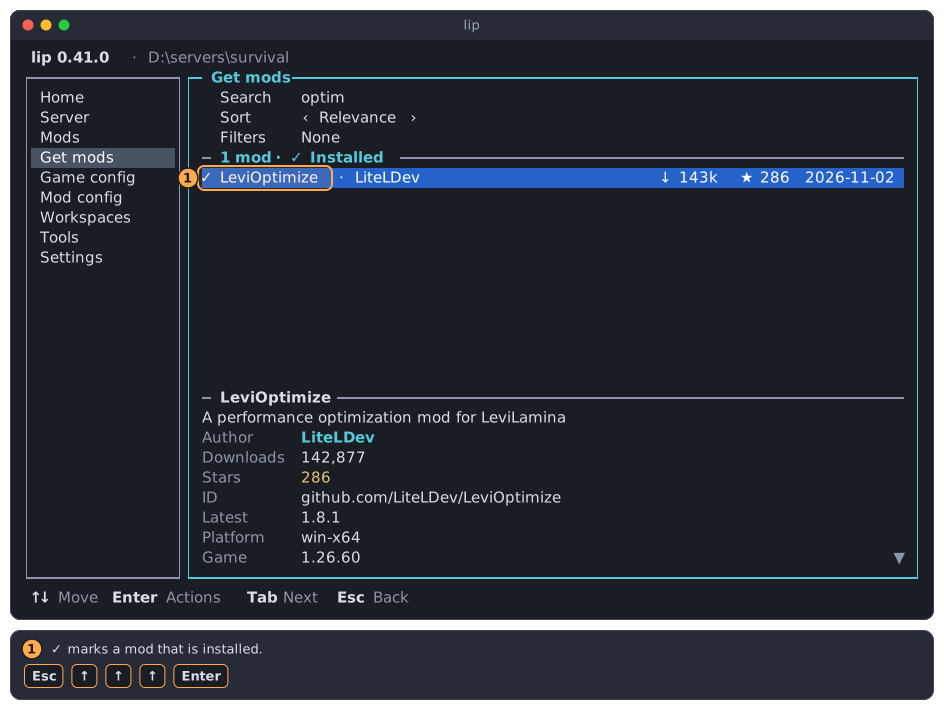
Start the server
-
Two steps are ticked (1), and Start the server is selected (2). Press
Enter.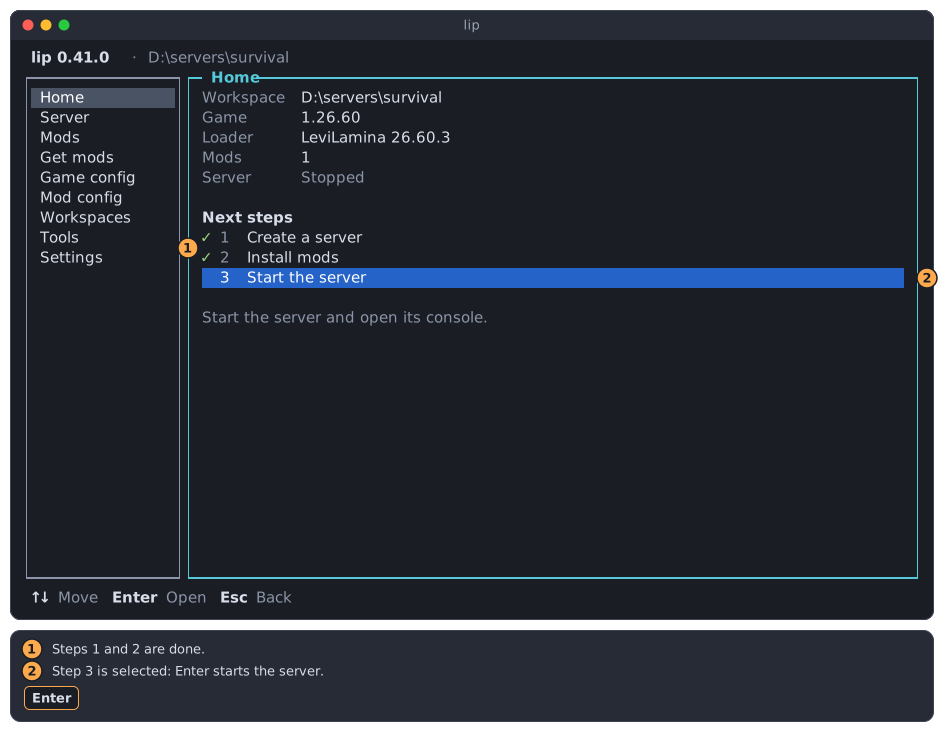
-
lipstarts the server and shows the Server page.- (1) The first line says that the server runs, and for how long. The top line and the sidebar show a green dot too.
- (2) Output is what the server writes. Wait for the line
Server started.: from then on, players can join. The lines of[LeviLamina]show the mod being loaded. - (3) The line at the bottom is where you type commands for the server.
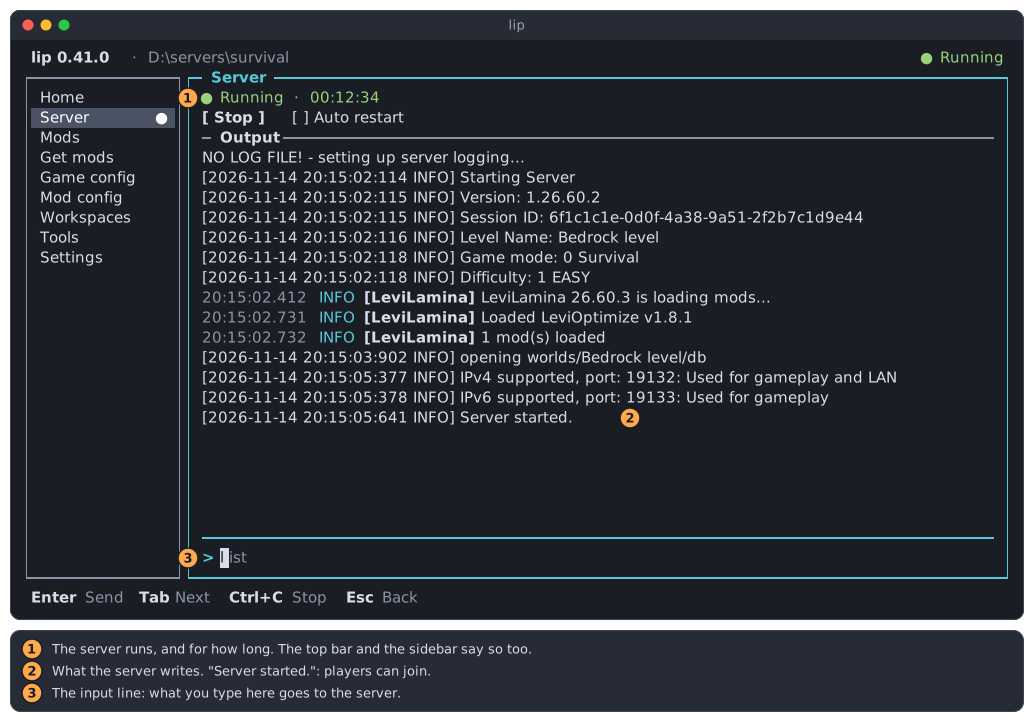
To play, add a server in Minecraft with the address of this computer and the port
19132, the port that the output names. -
Give the server a command. Type
list, a command of the game that names the players who are online, and pressEnter.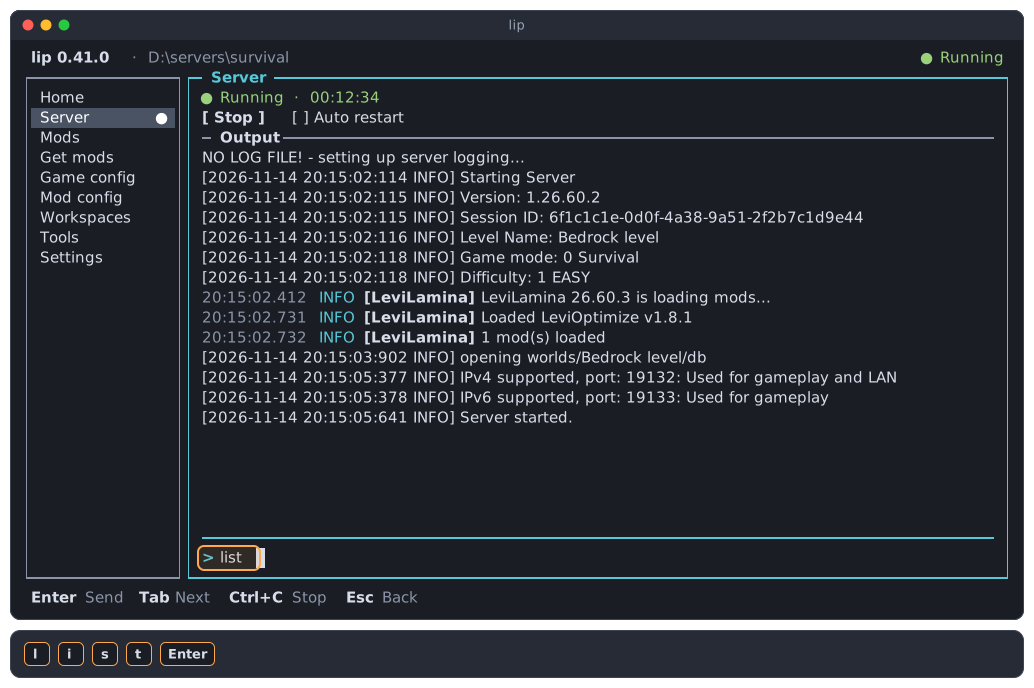
-
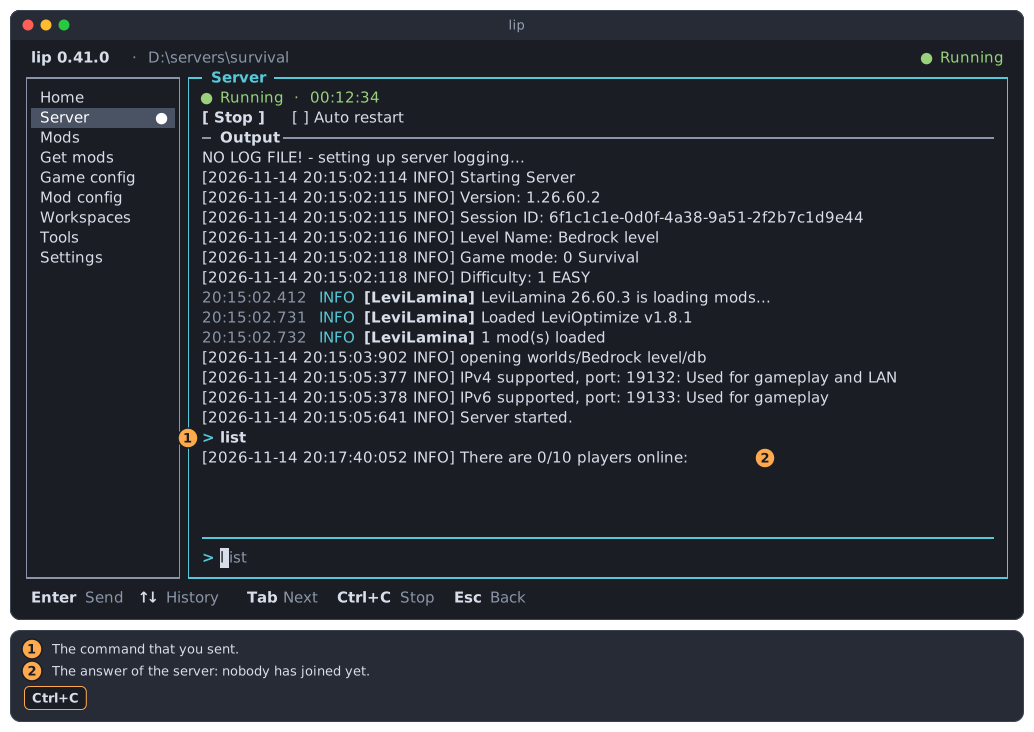
The output shows (1) the command you sent and (2) what the server answered. Nobody has joined yet.
The commands of the game and of your mods work here as in the console of the server, without the leading
/.
-
Stop the server: press
Ctrl+C.lipsends the server its commandstop, and waits. When the server has ended, the first line changes to Exited with code 0, which means that it ended normally.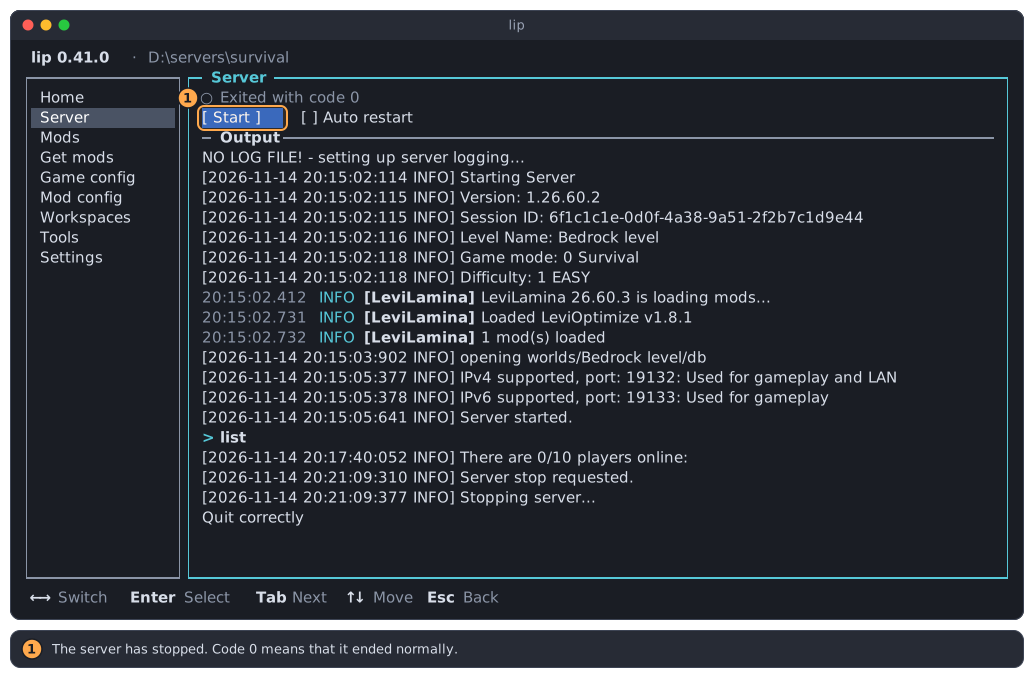
The marked button, Start, starts the server again.
To leave lip, press Esc until you are in the sidebar, press Esc once more, and confirm. If a server still runs, the question says whether it keeps running. Start lip again in any folder: your server is on the Workspaces page.
What you have now
- A folder,
D:\servers\survival, that holds the game, LeviLamina and one mod. It is an ordinary folder: you can look into it, back it up and move it. - A server that you start and stop on the Server page.
Stop the server before you change it
While the server runs, lip does not install, update or remove anything in its folder, and does not save server.properties, the allowlist or the permissions. Stop the server first, then make the change.
What to do next
- Change the name of the server, the game mode or the number of players: Game config.
- Find more mods: Get mods. Update or remove the ones you have: Mods.
- Change the settings of a mod: Mod config.
- Let the server restart by itself after a crash, and see what else the Server page does: Server.
- Add a second server, or change the version of the game: Workspaces.
- Learn the interface properly: A tour of the interface.
- Do all of this with commands instead: A server from the commands.
- Something went wrong? See Troubleshooting.