
Mods
The Mods page lists what is installed in your server. After this page you can read the list, install a mod from a file, a folder or an address, update mods, and uninstall them, and you know exactly what each kind of update does.
To find and install the mods of levimc.org, use the Get mods page instead. If the keys or the parts of the screen are new to you, read A tour of the interface first.
The list
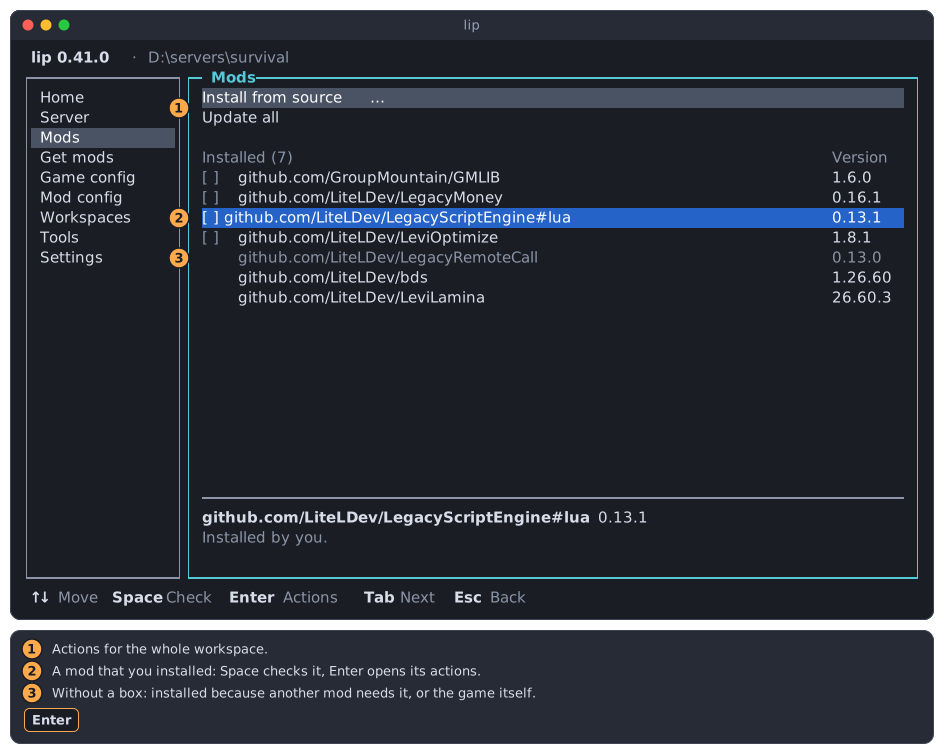
- The action rows act on the whole workspace.
- Your mods: the mods that you installed. Each has a box,
[ ], in front of it. - Rows without a box, in two groups: first the dependencies, in gray, then the game and its loader.
Each row shows a mod and its version. The name is the address of the mod's repository, such as github.com/LiteLDev/LeviOptimize. A part after # is the variant of the mod that is installed, for example #lua.
| Group | What it is | What you can do with it |
|---|---|---|
| Your mods | A mod that you asked for. | Check it, update it, uninstall it. |
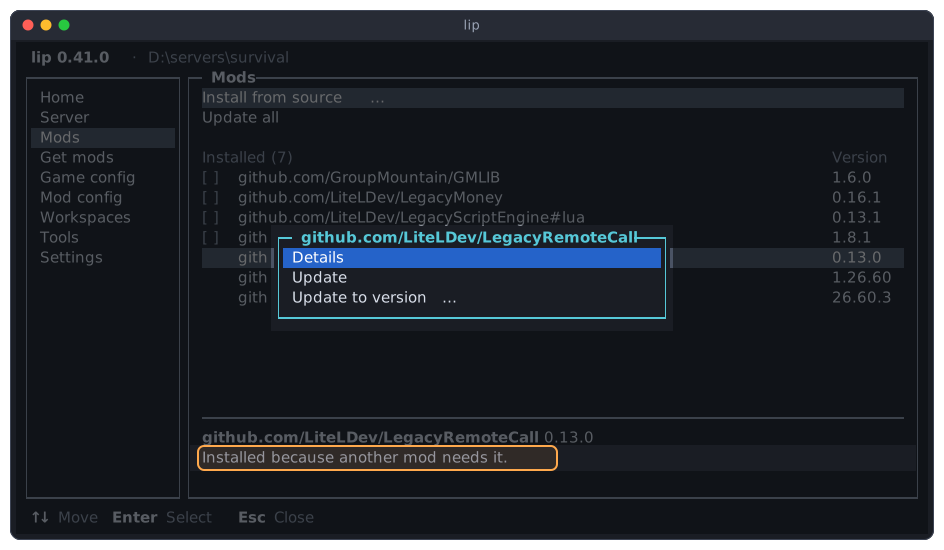
| Dependencies | A mod that was installed because another mod needs it. | Update it. It cannot be uninstalled by itself: it goes when no mod needs it any more. |
| The game and its loader | github.com/LiteLDev/bds is the Minecraft server, github.com/LiteLDev/LeviLamina the loader. | Nothing here. Their versions are changed on the Workspaces page. |
The header of the list, Installed (7), counts every row, the game and the loader included.
↑ on the first mod goes to the action rows, and ↓ on the last action row goes back to the list. Tab also goes from the action rows to the list.
INFO
The order of the list does not change when you install, update or uninstall something. Each group is sorted by name, and the highlight stays on the mod it was on.
The details area
The lower part of the page says more about the highlighted row: its name and version, and one sentence about what it is.
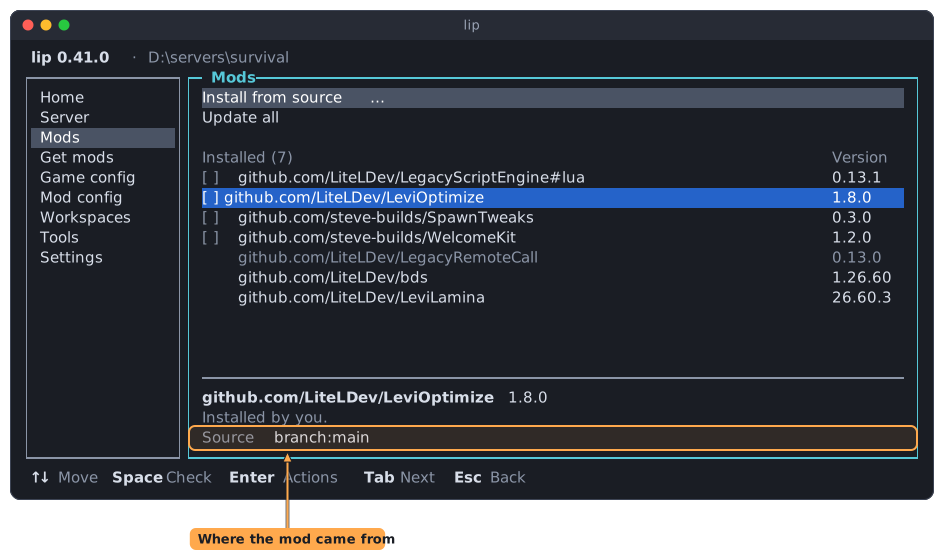
For a mod that did not come from a numbered version of its repository, a third row, Source, says where it came from:
| Source row | The mod was installed from |
|---|---|
| None | A version of its repository. This is what Get mods installs. |
branch:main, tag:… or rev:… | A branch, a tag or a commit of its repository. |
An address that starts with https:// | A .zip file on the web. |
A path, such as D:\downloads\SpawnTweaks | A .zip file or a folder on your disk. |
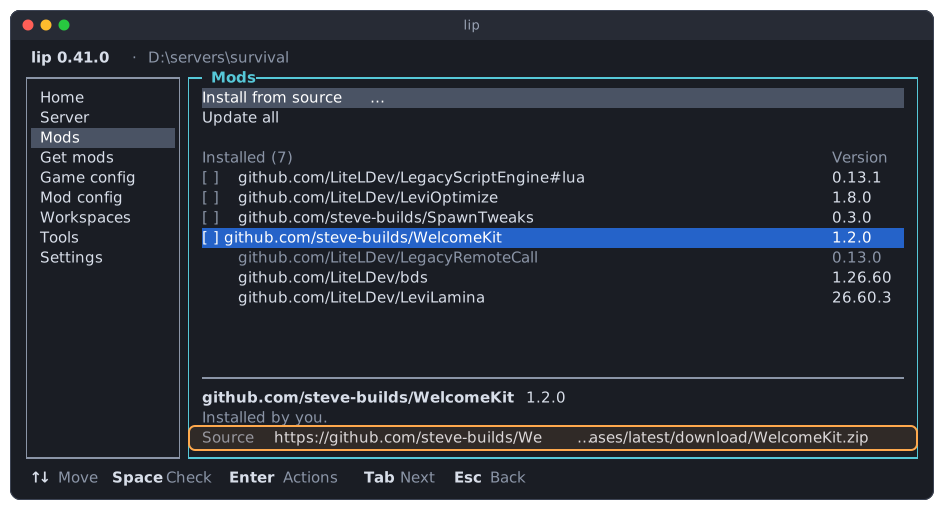
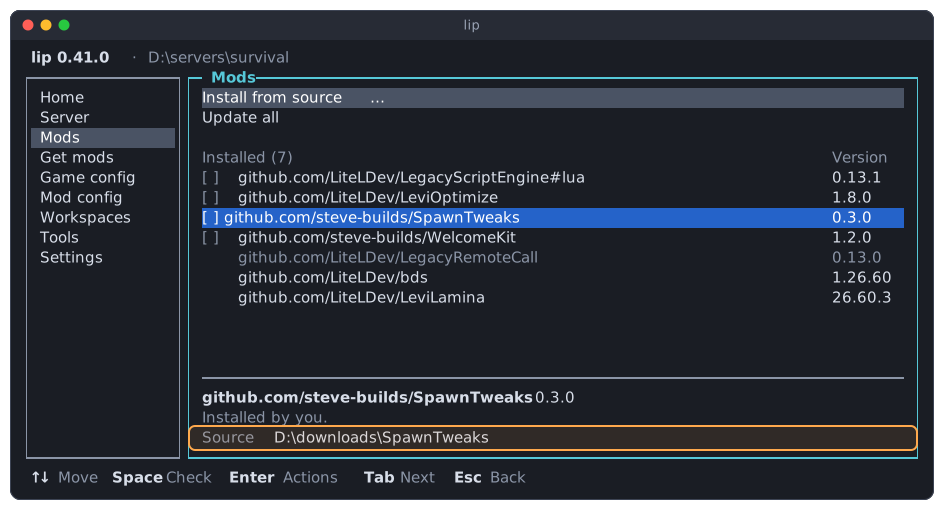
The source decides what Update does: see What an update does.
A folder without a server, or without mods
In a folder without a server, the list is empty, and the first action row leads to creating one. Mods need a server.
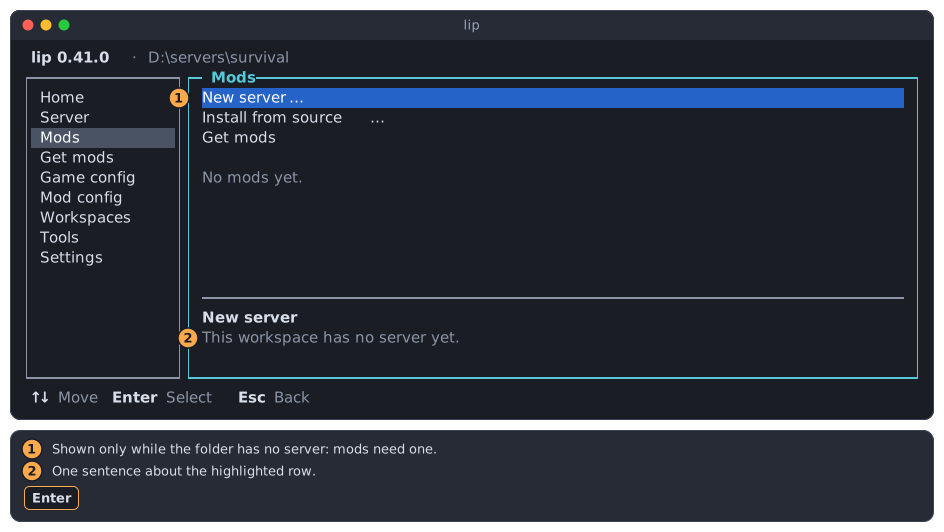
- New server… is there only while the folder has no server.
- The details area says one sentence about the highlighted row.
In a server without mods, the list holds only the game and its loader, and Get mods takes the place of Update all:
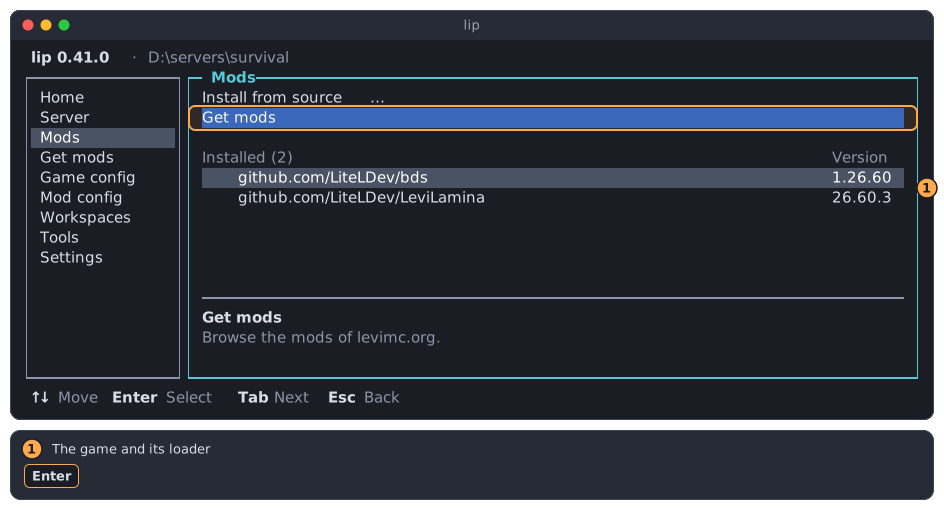
The menu of a mod
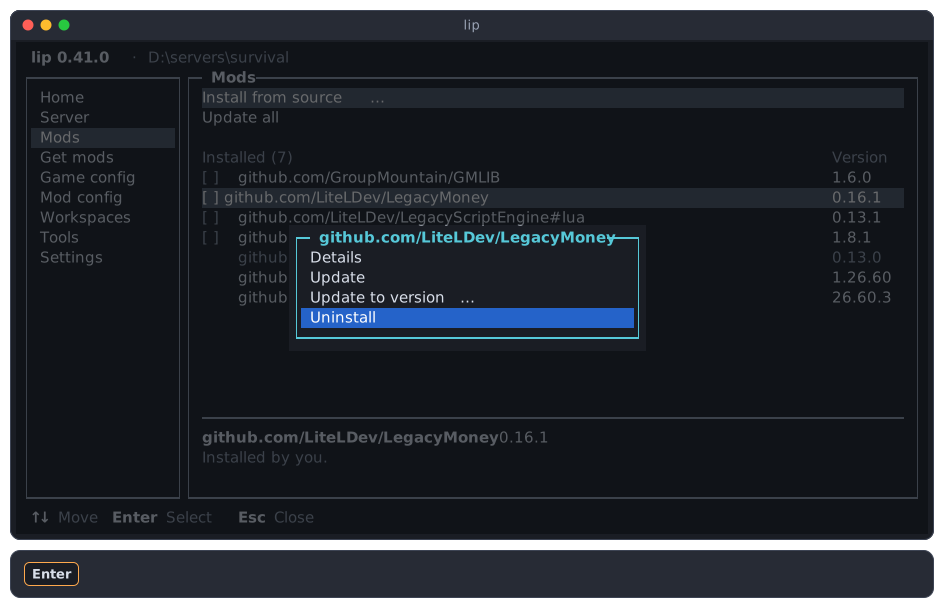
Press Enter on a row to open its menu.
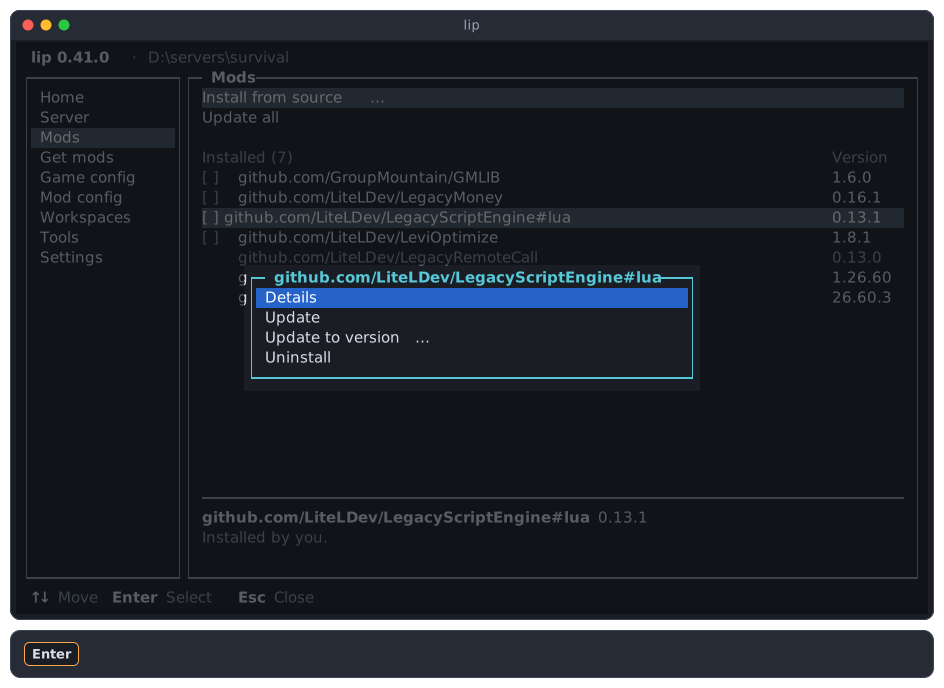
| Action | Does |
|---|---|
| Details | Shows what levimc.org says about the mod. |
| Update | Moves the mod to the newest version that fits your server. |
| Update to version… | Moves the mod to a version that you name. |
| Uninstall | Removes the mod and its files. |
A dependency has no Uninstall:
The game and the loader have only Details and Go to Workspaces:
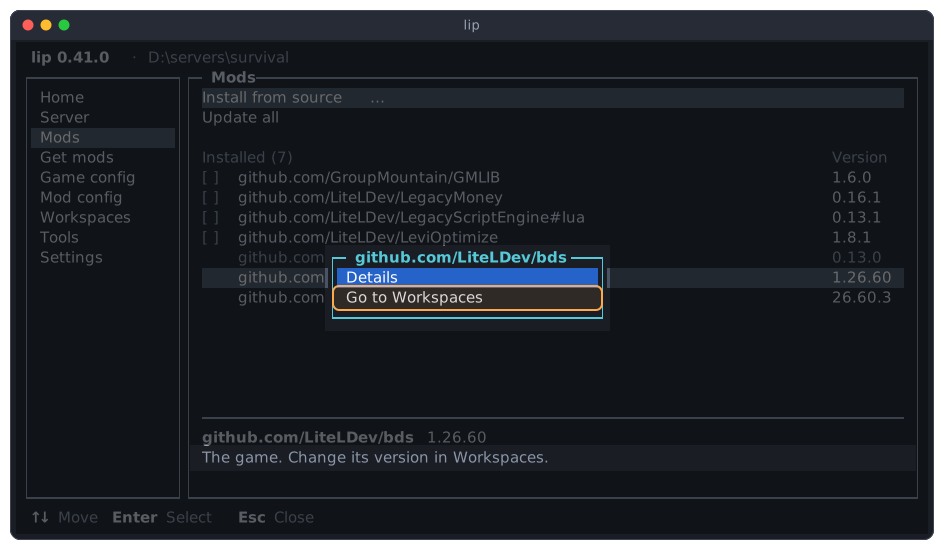
Details
Details shows the mod as the Get mods page shows it: its description, author, downloads, stars, license and what it depends on.
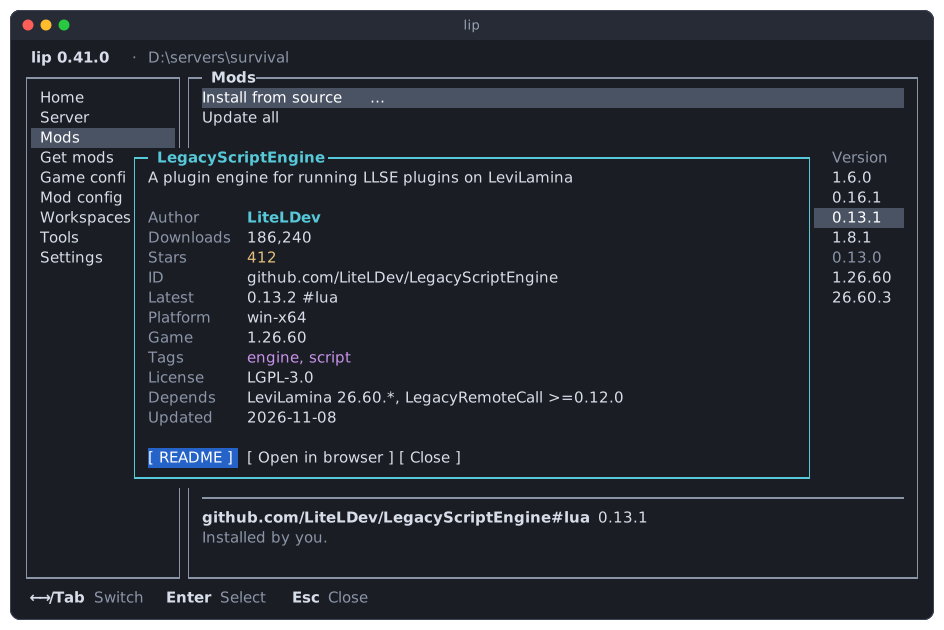
README opens the text that the author wrote about the mod. Open in browser opens the page of the mod on levimc.org.
The details come from the catalogue of levimc.org. When the catalogue does not list the mod, as for the game itself or for a mod that you installed from your own disk, lip says so:
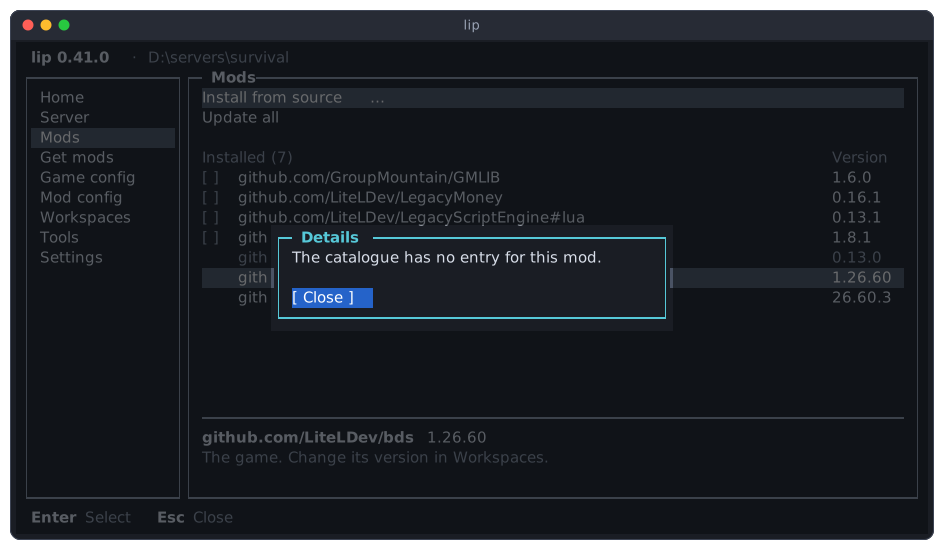
When the catalogue cannot be read, lip says "Cannot read the catalogue." Try again when your connection is back.
Installing from a source
Install from source… installs a mod that you name yourself, instead of one that you pick on the Get mods page. Use it for a .zip file or a folder that someone gave you, or for a mod that levimc.org does not list.
-
Press
↑until the action row Install from source… is highlighted, thenEnter. lip asks how you want to name the mod.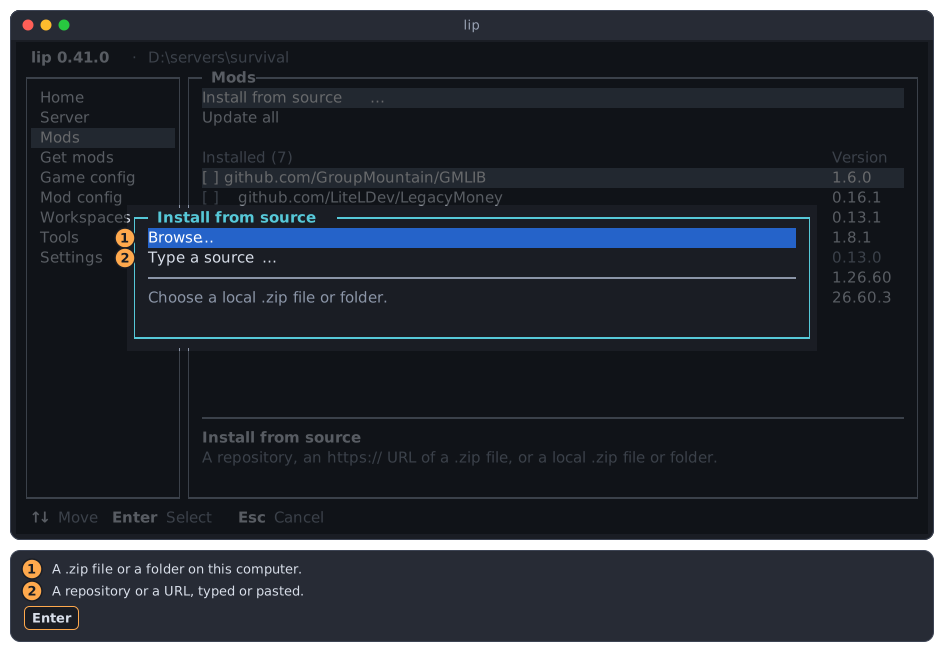
-
Choose one of the two ways below.
Browse…
Choose Browse… for a .zip file or a folder on your disk. lip opens the file browser, which lists folders and .zip files.
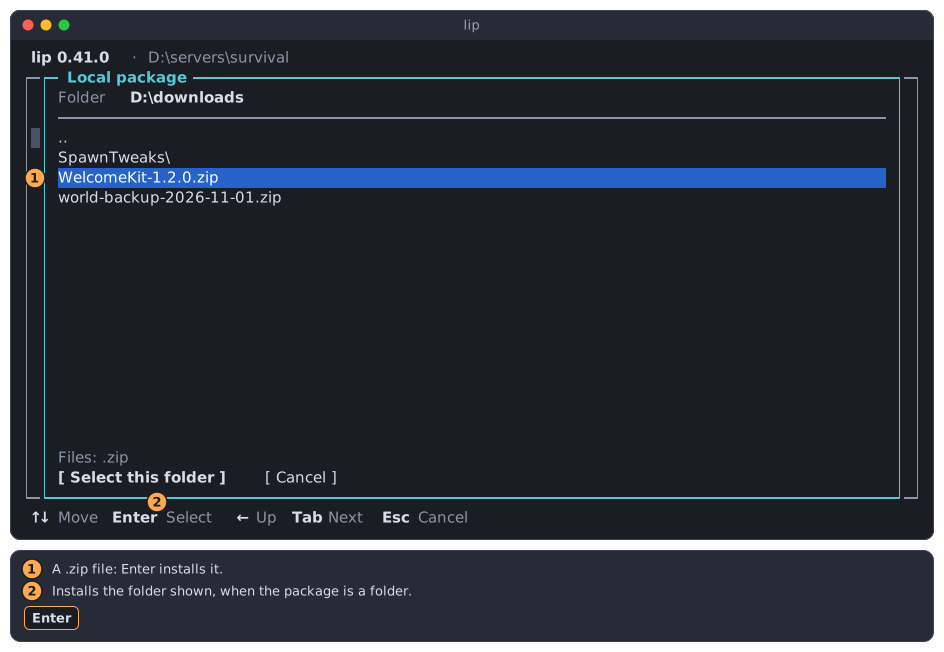
- For a
.zipfile, highlight it and pressEnter. - For a package that is a folder, open that folder and choose Select this folder.
lip then shows the plan:
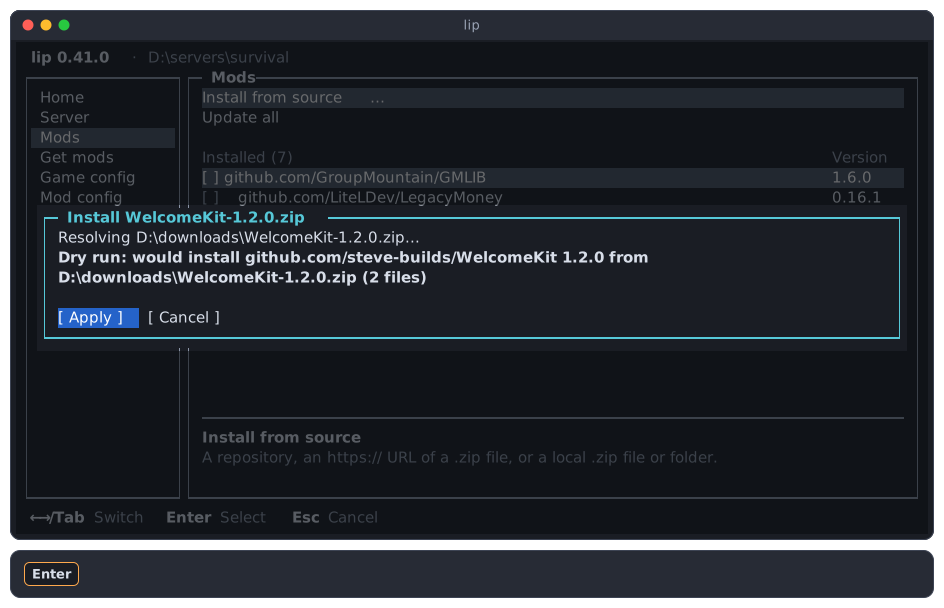
Choose Apply to install. Esc in the browser goes back to the choice.
Type a source…
Choose Type a source… for a mod on the web. The field is empty at first, and shows an example in gray.
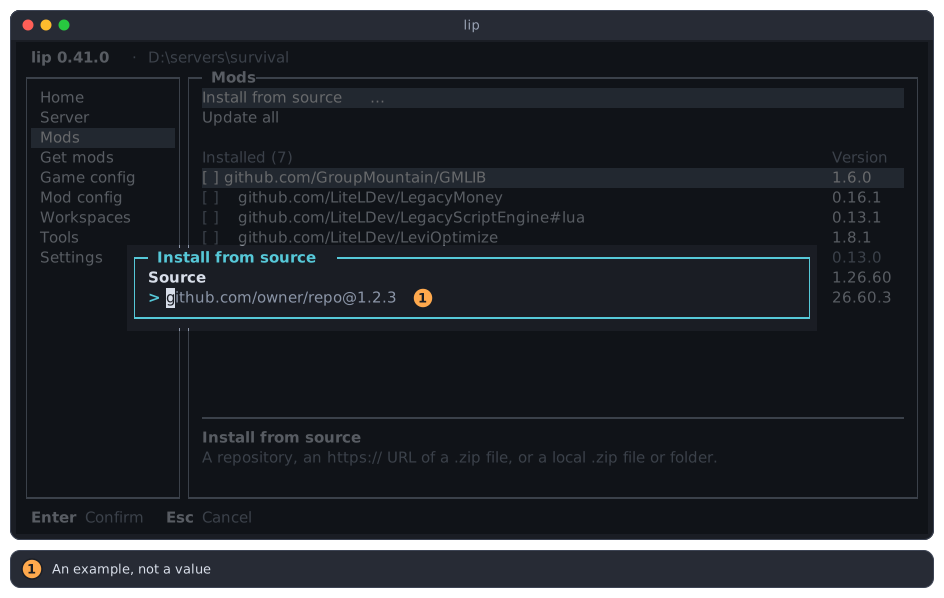
Type or paste one of these:
| What you type | Installs |
|---|---|
github.com/engsr6982/PLand | The newest version of that repository that fits your server. |
github.com/engsr6982/PLand@0.19.0 | That version. |
github.com/LiteLDev/LegacyScriptEngine#lua | The variant lua of the mod. |
github.com/owner/repo@branch:main | The branch main. tag: and rev: name a tag and a commit in the same way. |
https://example.com/mod.zip | The .zip file at that address. |
D:\downloads\mod.zip | A file or a folder on your disk. Put a path that contains spaces in double quotes. |
To install several mods at once, separate them with spaces.
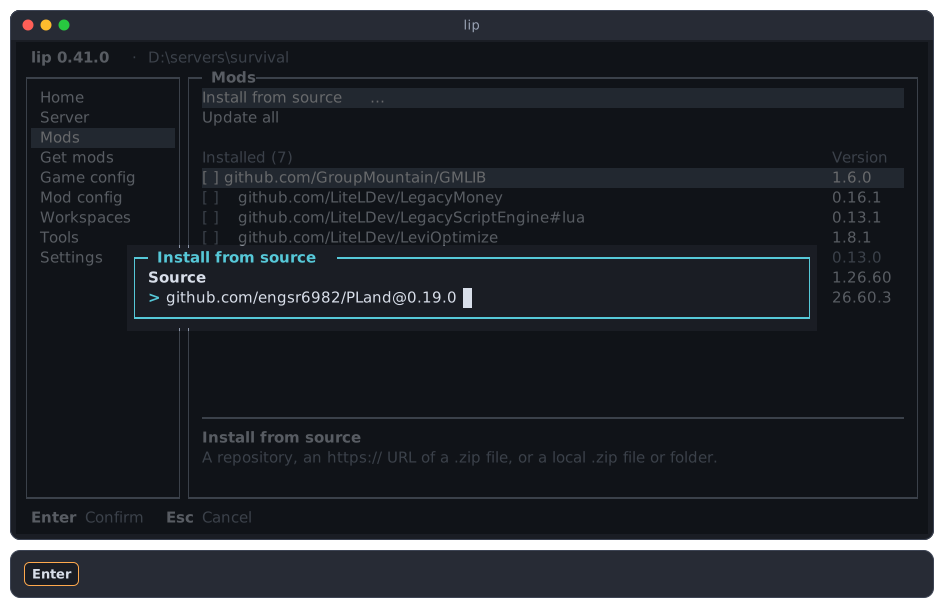
Press Enter. lip shows the plan; choose Apply to install.
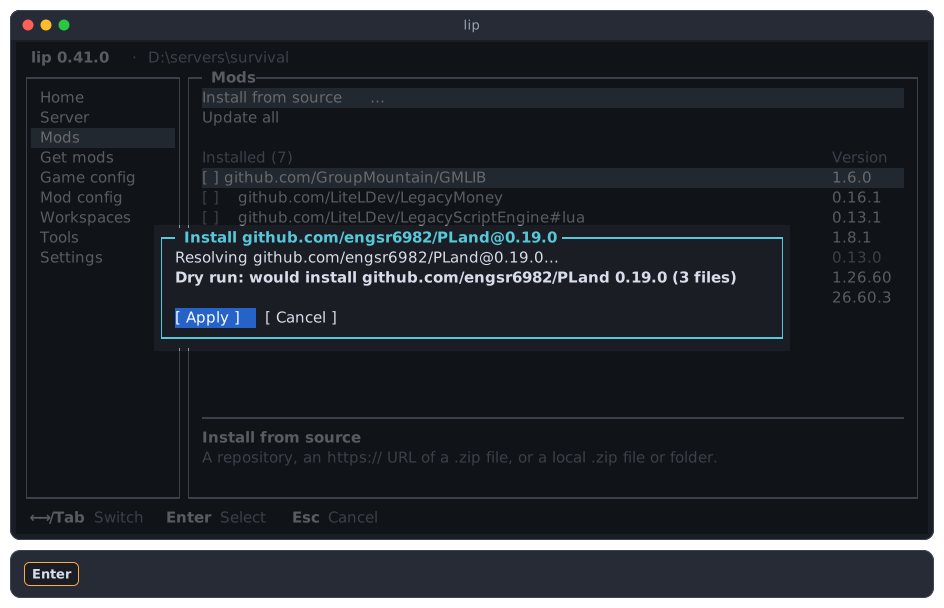
When the mod needs other mods, the plan lists those too, and lip installs them with it. Managing packages from the commands describes every form of a source.
Updating
There are three ways to update, and all of them show a plan first.
Update
Update in the menu of a mod moves that mod to the newest version that fits the game and the LeviLamina of your server.
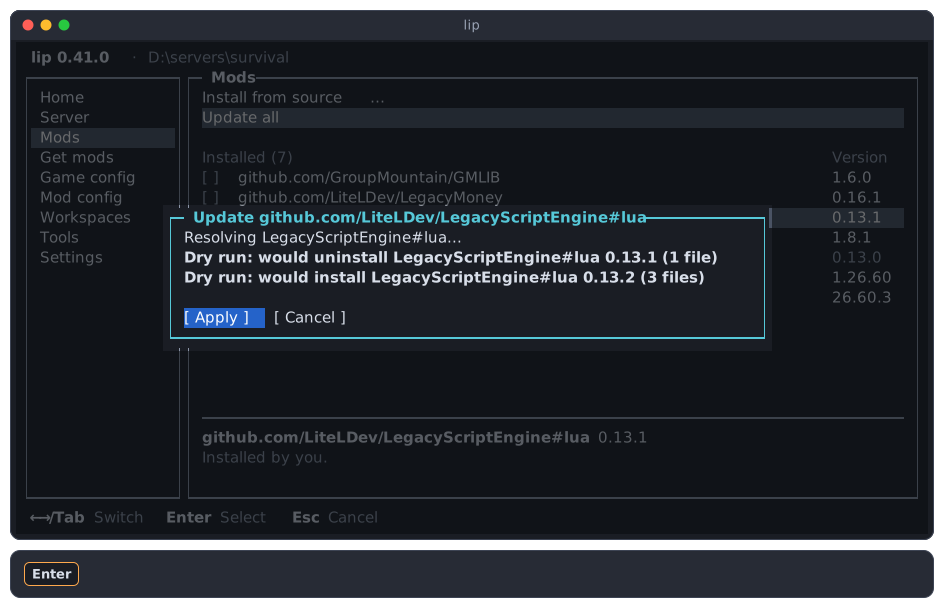
An update removes the old version and installs the new one. Choose Apply:
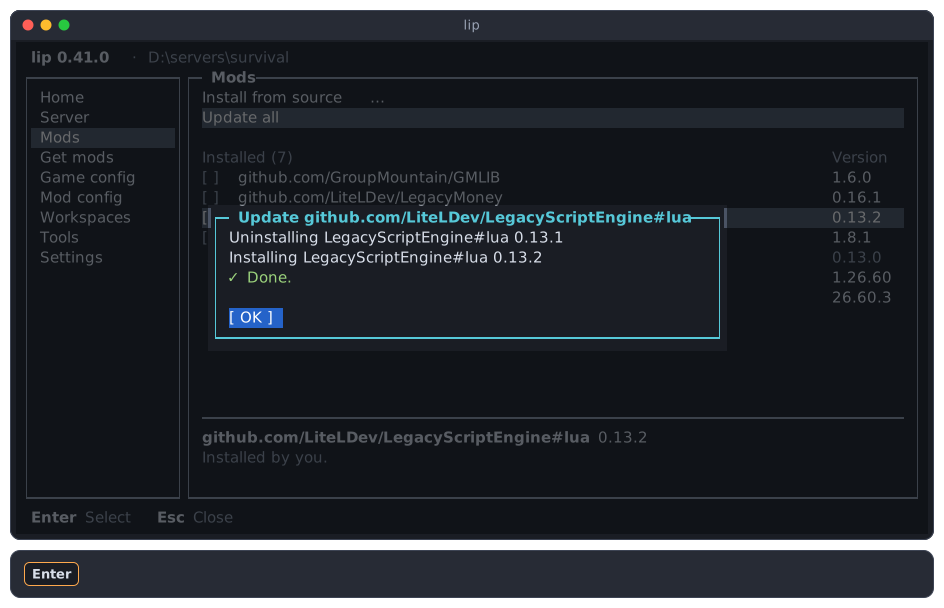
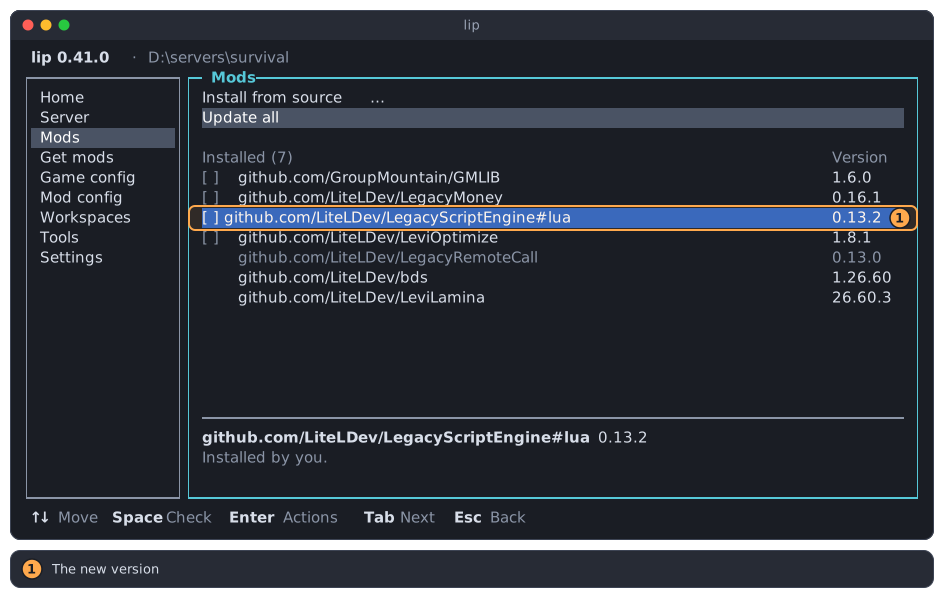
The list then shows the new version:
Update to version…
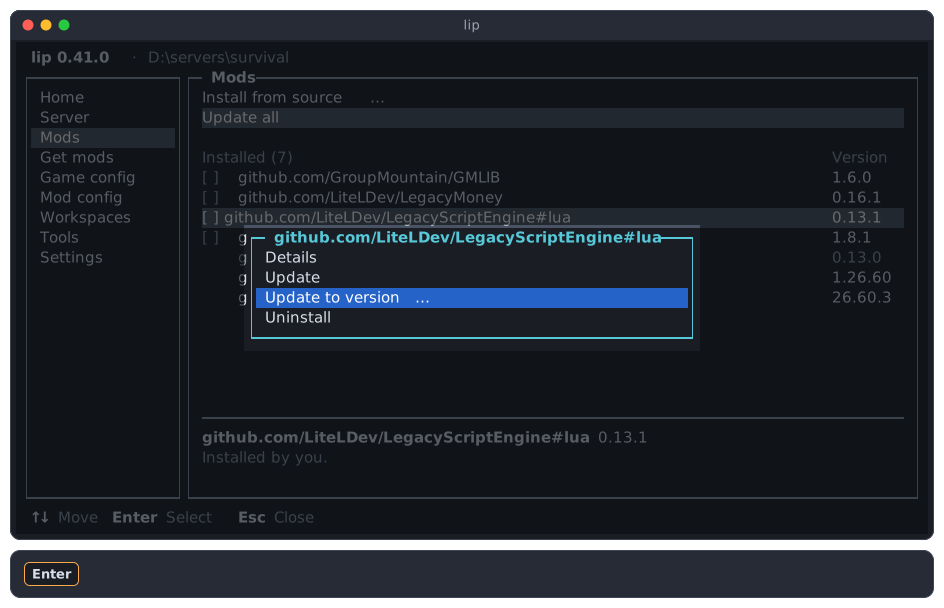
Update to version… moves the mod to a version that you choose. It can be newer or older than the installed one, so this is also how you go back to an earlier version.
-
Open the menu of the mod and choose Update to version….
-
Type what follows the
@: a version such as0.13.0, orbranch:,tag:orrev:with a name.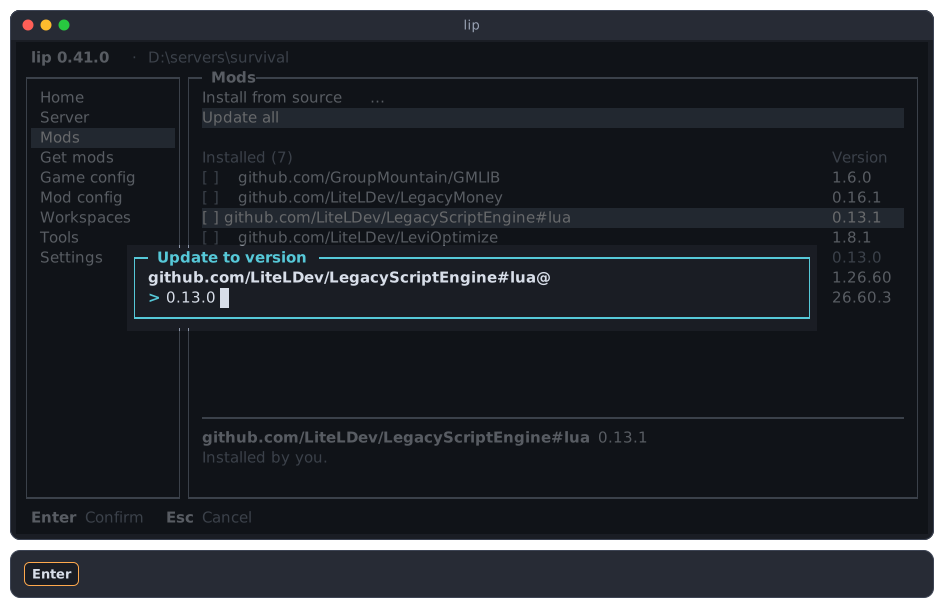
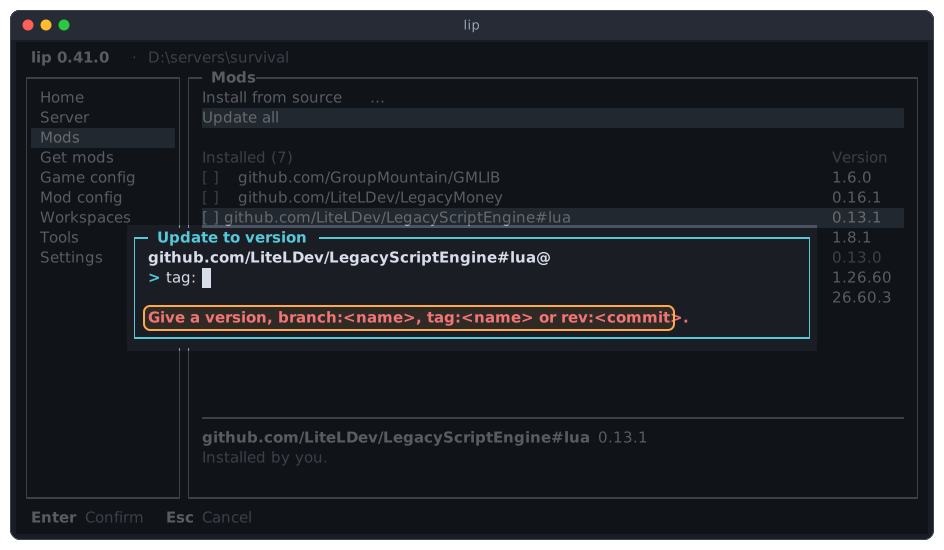
If lip cannot read what you typed, the dialog stays open and says what it expects.
-
Press
Enter, read the plan, and choose Apply.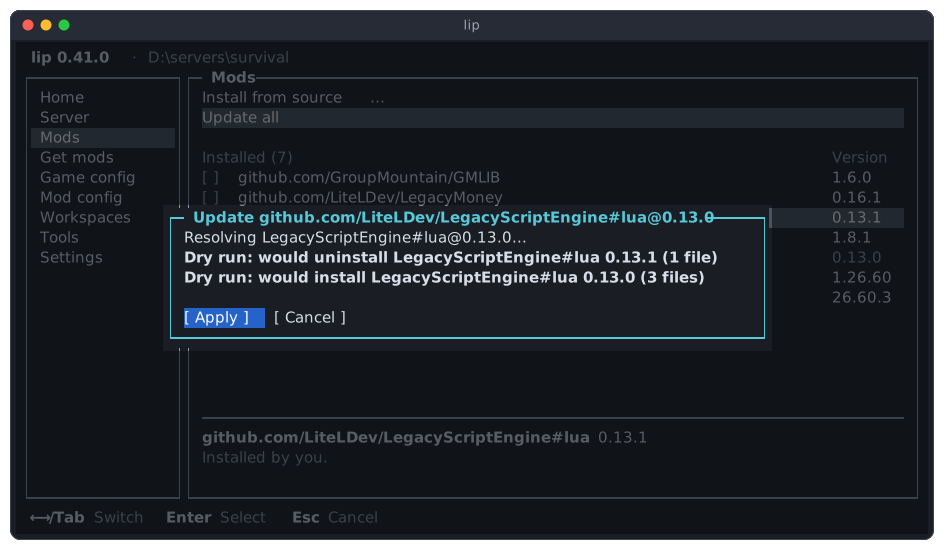
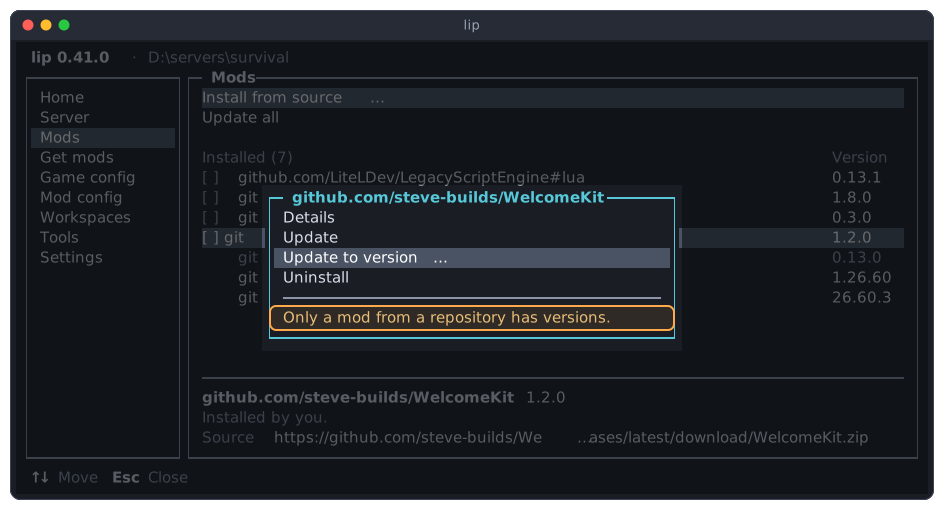
A mod that was installed from a .zip file on the web or from your disk has no other versions to name. The action is gray for it, and the menu says why:
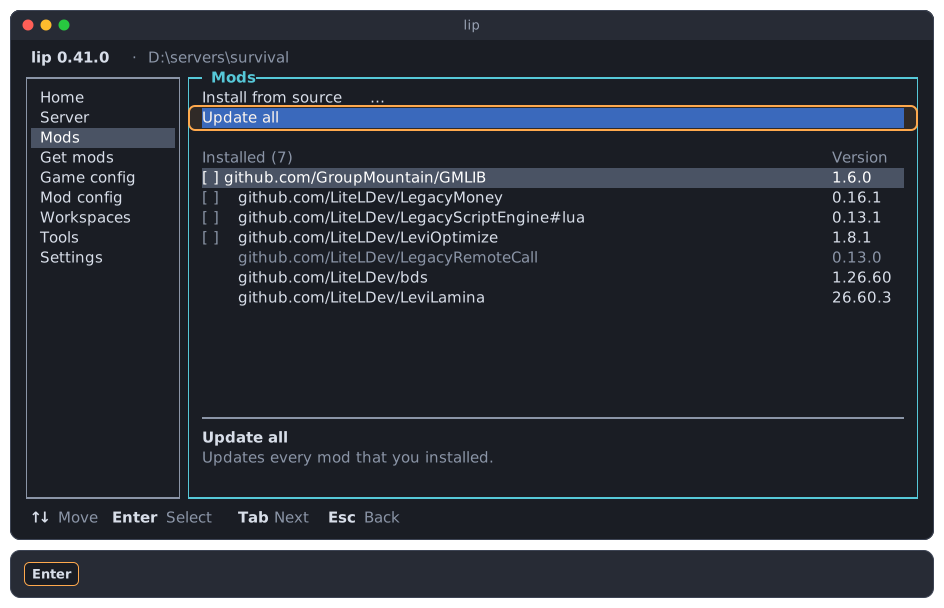
Update all
Update all is the second action row. It updates every one of your mods, each as Update would update it alone. It leaves the dependencies, the game and the loader as they are, unless a newer mod needs a newer dependency.
The plan lists only what would change. Here one of four mods has a newer version:
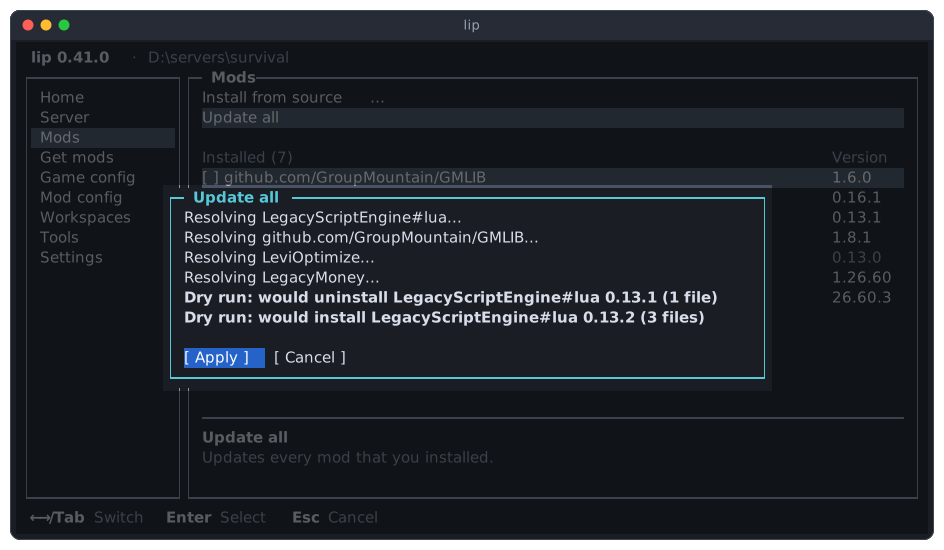
A mod that was installed from a folder or a file that no longer exists is kept as it is, and the plan says so.
What an update does
What Update, and Update all, do with a mod depends on where it was installed from. The Source row tells you which case applies.
| The mod was installed from | Update |
|---|---|
| A version of its repository, for example by Get mods | Moves it to the newest version that fits your server. It does not stay at the version you once picked. |
A branch, such as branch:main | Stays on that branch and takes its newest state. |
| A tag or a commit | Stays there. A commit never changes; a tag does only if its author moved it. |
A .zip file on the web | Downloads the file again and installs what it holds now. |
A .zip file or a folder on your disk | Reads it again and installs what it holds now. |
Here Update downloads the file of a mod from the web again, and finds a newer version in it:
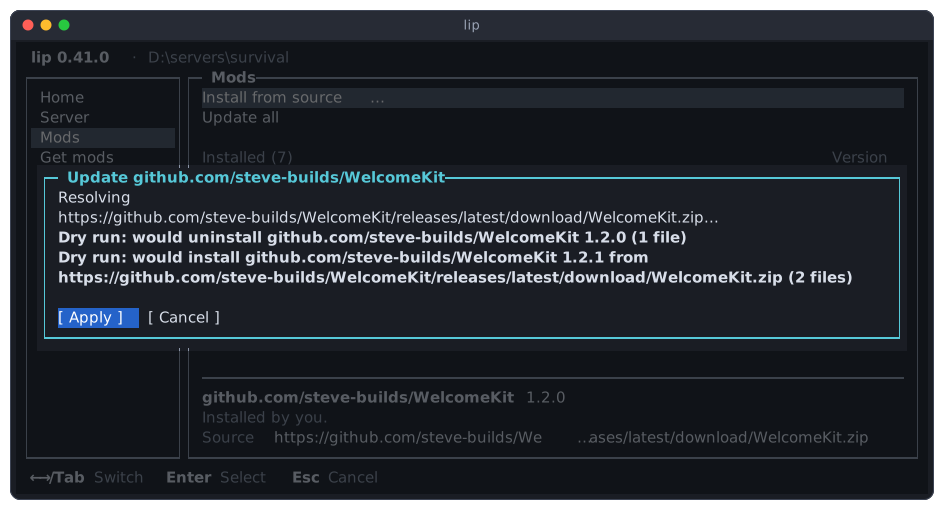
Update to version… always moves the mod to what you name, wherever it was before. For a mod on a branch, naming a version takes it off the branch.
To keep a mod at one version, do not update it. There is no way to pin a mod so that Update all skips it.
When there is nothing newer
When a mod is already at its newest version, there is nothing to apply: the plan says "Nothing would change." and has only a Close button. That holds however often you choose Update, also for a mod that Get mods installed at the version you picked.
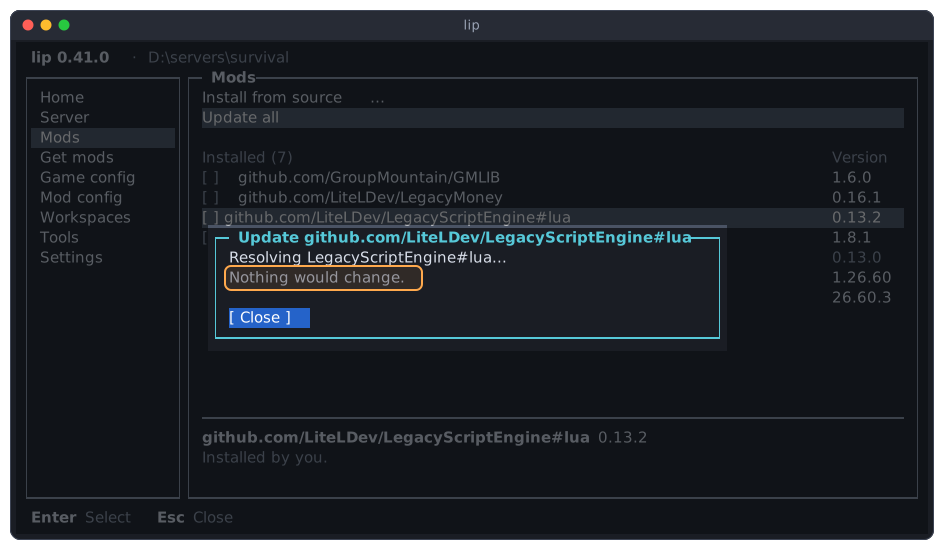
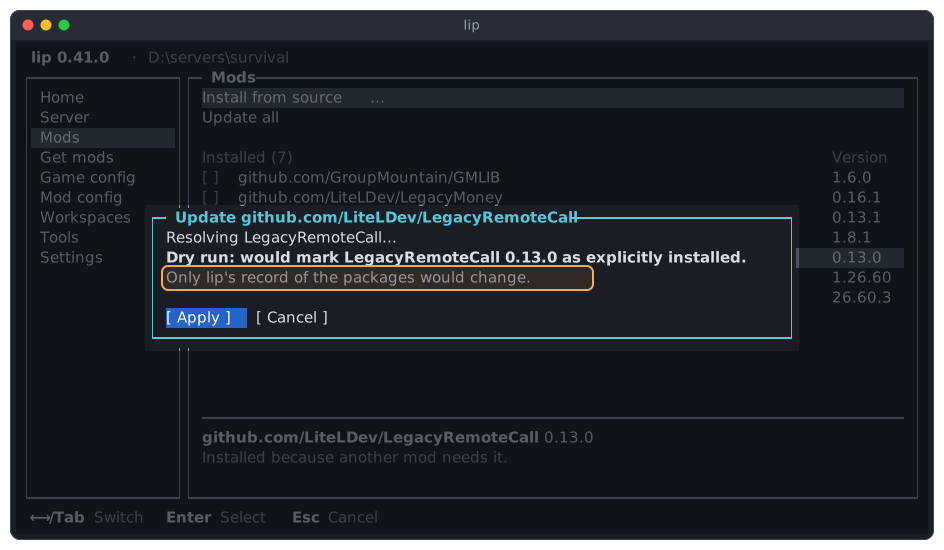
Two plans say instead that only lip's record would change. No file of your server changes in either case, and you can apply or cancel them as you like.
The first is Update to version… with the version that the mod already has. lip then writes down that you want this version.
The second is an Update of a dependency. lip then counts the dependency as one of your mods: it moves up into your mods, gets a box, and can be uninstalled.
Uninstalling
-
Highlight the mod and press
Enter. -
Choose Uninstall.
-
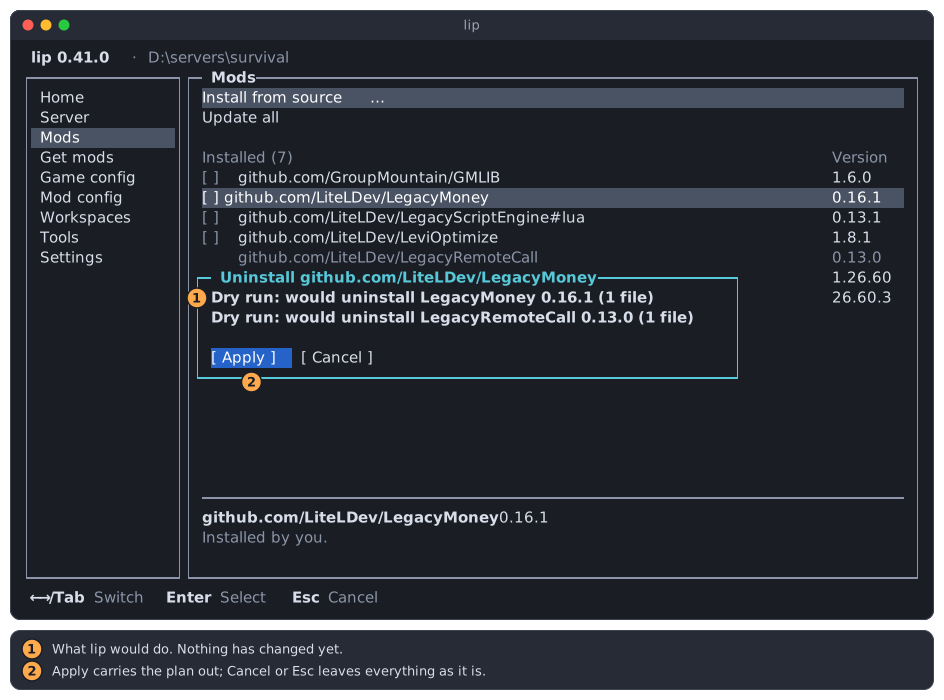
Read the plan. It lists the mod, and every dependency that no other mod needs any more.
-
Choose Apply.
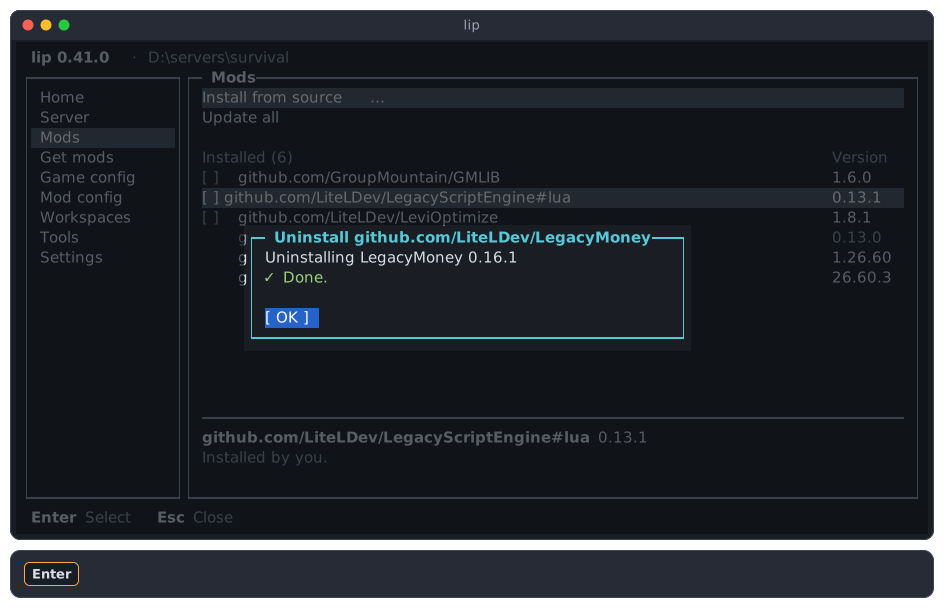
Uninstalling removes the files that the mod installed. Files that the mod made while the server ran, such as its configuration or its data, may stay in its folder below mods.
Several mods at once
To update or uninstall several mods in one go, check them first.
-
Highlight a mod and press
Space. Its box becomes[x]. Do the same for the others.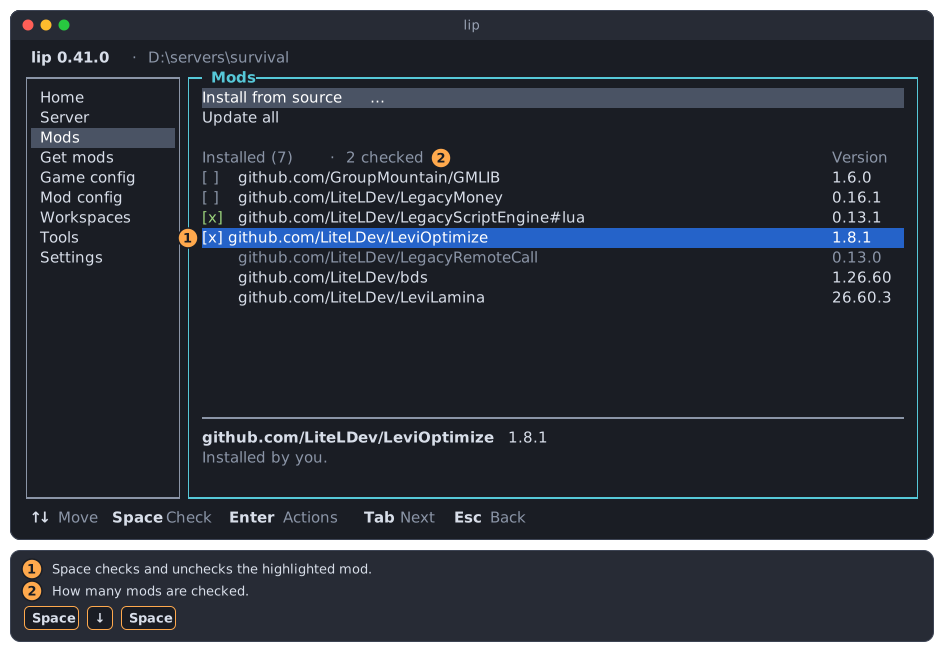
Spacechecks and unchecks the highlighted mod.- The header says how many are checked.
-
Press
Enter. The menu is now about the checked mods.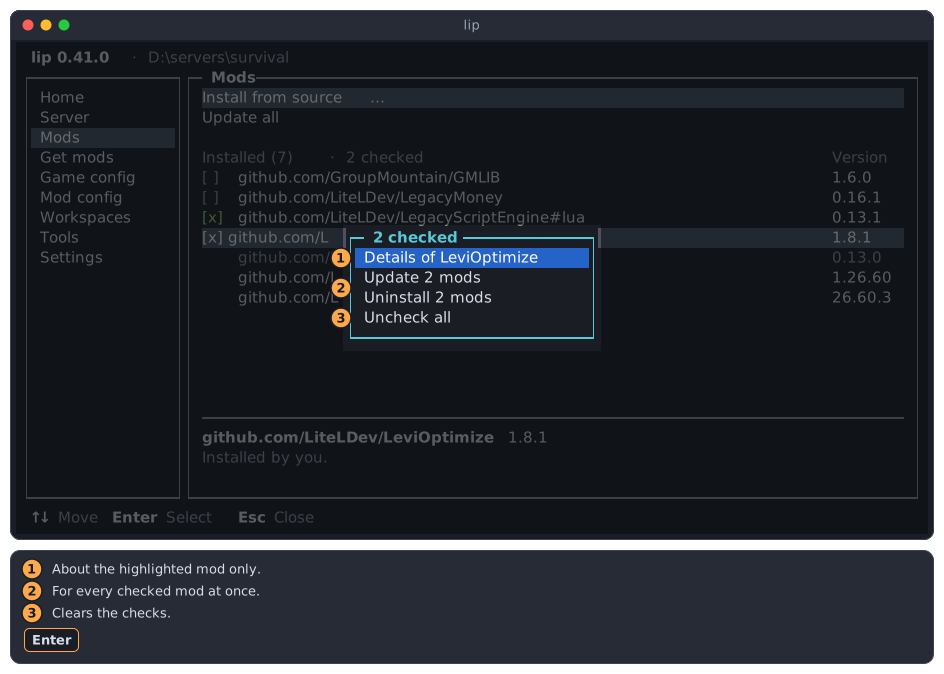
- Details of … is about the highlighted row only, which need not be a checked one.
- Update … mods and Uninstall … mods act on every checked mod, in one plan.
- Uncheck all clears the checks.
Only your mods can be checked. Dependencies, the game and the loader have no box. The checks are cleared after an update or an uninstall.
While the server runs
While the server of the workspace runs, the page is for reading only.
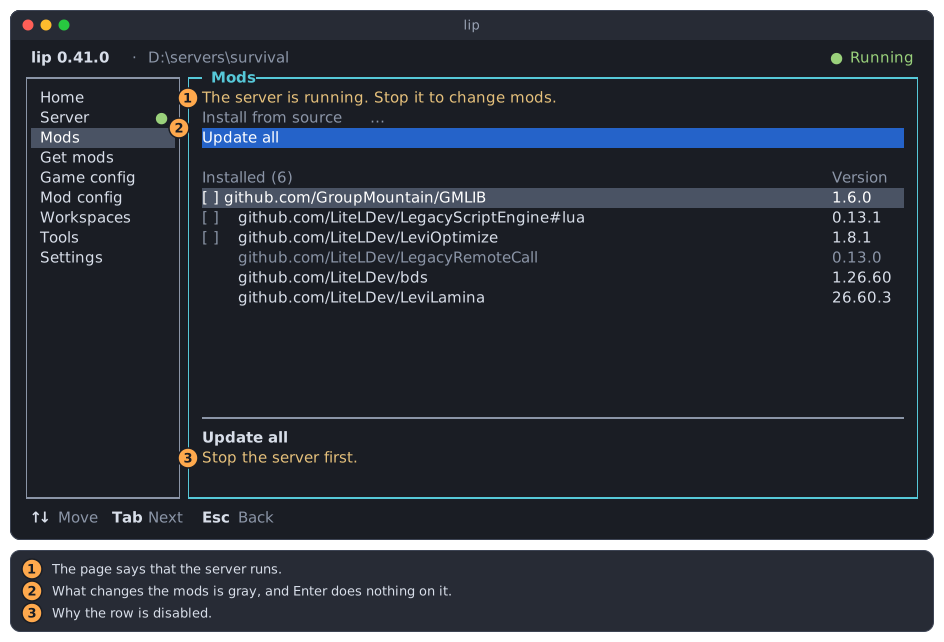
- A line at the top of the page says that the server runs.
- Install from source… and Update all are gray, and
Enterdoes nothing on them. - The details area says "Stop the server first."
In the menu of a mod, Update, Update to version… and Uninstall are gray, with the same reason. Details still works.
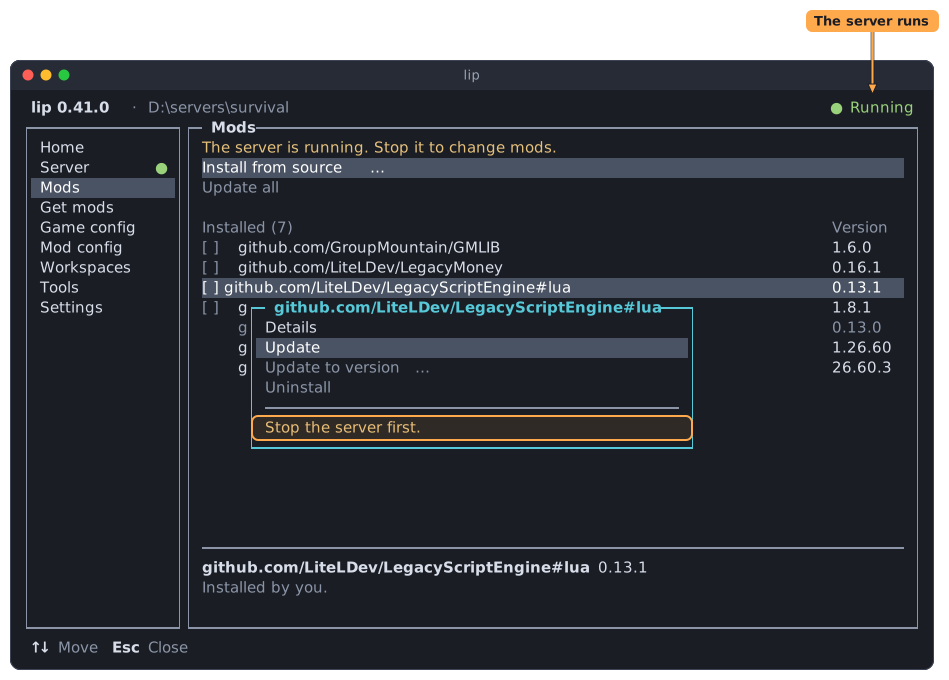
If the server starts or stops while a menu is open, the menu follows at once.
Stop the server on the Server page, change your mods, and start it again. A mod is loaded when the server starts, so a change needs a restart anyway.