你的第一個 LeviLamina 模組
完成本教程後,你會擁有一個用 C++ 編寫的 LeviLamina 模組:它的倉庫由官方模組模板創建,在你的電腦上構建,並由你的服務器加載。模組啟動時會在服務器控制台輸出一行文字,還會添加一個 /hello 命令,向執行它的人打招呼。
第一次大約需要一小時,大部分時間花在安裝工具和等待第一次構建下載 LeviLamina 上。
你需要準備
- 一臺 Windows 10 或 11 電腦(x64)。模組使用 Windows 工具構建。
- C++ 基礎。如果你剛開始學 C++,可以從 cppreference.com 和 C++ Developer Roadmap 入手。
- 一個 GitHub 賬號,用來從模板創建倉庫。
- 一個裝有 LeviLamina 的服務器用於測試:見開你的第一個服務器。本教程使用
D:\servers\survival。
1. 安裝工具
按默認選項安裝以下軟件:
- Git。
- Visual Studio(免費的 Community 版即可)。在安裝程序中勾選工作負載 使用 C++ 的桌面開發:它會帶來 Windows SDK 和 C++ 庫。
- LLVM,選擇
LLVM-<version>-win64.exe安裝程序。安裝時選擇把 LLVM 加入PATH。模板使用 LLVM 的clang-cl編譯。 - xmake,LeviLamina 模組的構建工具。
- 可選,用於編輯代碼:Visual Studio Code,以及擴展 C/C++、XMake 和 clangd。
打開一個新的終端,檢查這些工具能否找到:
git --version
clang-cl --version
xmake --version
你應該看到三個版本號。如果某個命令提示無法識別,請重新安裝它並讓它把自己加入 PATH,然後再打開一個新終端。
2. 從模板創建倉庫
-
打開 LiteLDev/levilamina-mod-template,點擊 Use this template → Create a new repository。給倉庫起個名字,例如
my-mod;如果以後想發佈,請設為公開(public)。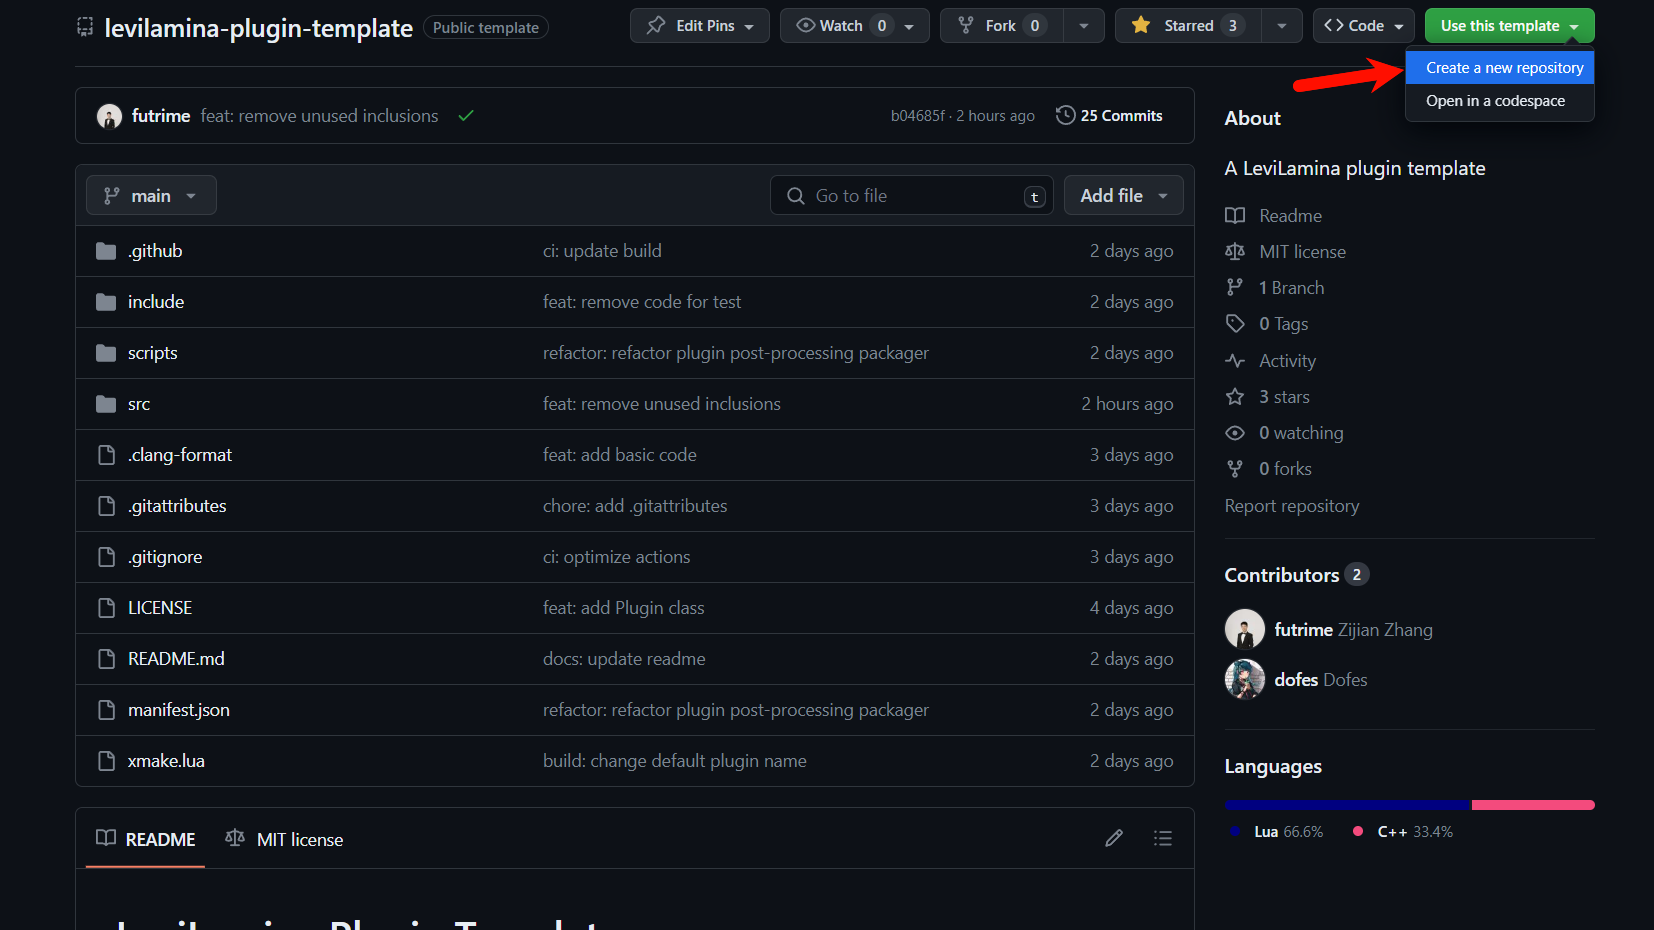
-
把它克隆到存放項目的文件夾:
powershellmkdir D:\projects cd D:\projects git clone https://github.com/<you>/my-mod cd my-mod -
你應該看到
xmake.lua、lip.toml、manifest.json等文件,以及包含MyMod.cpp和MyMod.h的src\mod\文件夾。
3. 給模組命名
-
打開
xmake.lua。target就是模組的名字:LeviLamina 會顯示它,模組的文件夾也以它命名。可以使用字母、數字和-,不能有空格:luatarget("my-mod") -- Change this to your mod name.本教程保留
my-mod。 -
在同一個文件中,固定構建所用的 LeviLamina 版本。它的前兩段版本號必須與服務器上的 LeviLamina 相同。要查看服務器的版本,在服務器文件夾中運行
lip list,它會顯示一行類似github.com/LiteLDev/LeviLamina@26.60.3的內容。然後寫:luaadd_requires("levilamina 26.60.*", {configs = {target_type = get_config("target_type")}}) -
修改
LICENSE中的版權人,或者換成你想用的許可證。模板本身使用 CC0,你可以自由選擇。
你也可以重命名 src\mod\ 中的命名空間 my_mod 和類 MyMod,本教程不需要這樣做。
4. 構建空模組
在寫代碼之前,先確認模板能構建。在倉庫文件夾中運行:
xmake f -y -p windows -a x64 -m release
xmake第一條命令把構建配置為服務端模組(默認值;--target_type=client 構建客戶端模組)。第一次運行時它會下載 LeviLamina 及其依賴,需要幾分鐘。第二條命令進行編譯。
最後一行應該顯示 build ok,並且出現文件夾 bin\my-mod\,裡面有 my-mod.dll 和 manifest.json。
下載失敗
xmake 從 GitHub 下載包。如果你的網絡無法訪問 GitHub,請為 xmake 配置 GitHub 鏡像代理或 HTTP 代理,然後重新運行這兩條命令。如果 xmake 找不到你固定的 LeviLamina 版本,運行 xmake repo -u 更新包列表。
5. 添加日誌和命令
LeviLamina 會依次調用模組的三個階段:load()、enable() 和 disable()。在 load() 中只做與遊戲無關的工作,例如讀取配置文件:這時遊戲還沒有準備好。命令註冊和事件監聽要從 enable() 開始。
命令要在遊戲請求註冊時註冊,也就是 ServerCommandRegisterEvent 事件。把 src\mod\MyMod.cpp 的內容替換為:
#include "mod/MyMod.h"

#include "ll/api/command/CommandHandle.h"
#include "ll/api/command/CommandRegistrar.h"
#include "ll/api/event/EventBus.h"
#include "ll/api/event/command/ServerCommandRegisterEvent.h"
#include "ll/api/mod/RegisterHelper.h"
#include "mc/server/commands/CommandOrigin.h"
#include "mc/server/commands/CommandOutput.h"
#include "mc/server/commands/CommandPermissionLevel.h"
#include "mc/world/actor/player/Player.h"

namespace my_mod {

MyMod& MyMod::getInstance() {
    static MyMod instance;
    return instance;
}

bool MyMod::load() {
    getSelf().getLogger().debug("Loading...");
    return true;
}

bool MyMod::enable() {
    getSelf().getLogger().info("Hello from my first mod!");

    using namespace ll::event;
    EventBus::getInstance().emplaceListener<ServerCommandRegisterEvent>([](ServerCommandRegisterEvent&) {
        auto& command = ll::command::CommandRegistrar::getInstance(false) // false:服务端命令
                            .getOrCreateCommand("hello", "Says hello.", CommandPermissionLevel::Any);
        command.overload().execute([](CommandOrigin const& origin, CommandOutput& output) {
            auto* entity = origin.getEntity();
            if (entity == nullptr || !entity->isPlayer()) {
                output.success("Hello, console!"); // 由控制台或命令方块执行
                return;
            }
            auto* player = static_cast<Player*>(entity); // 安全:上面已检查 isPlayer()
            output.success("Hello, {}!", player->getRealName());
        });
    });
    return true;
}

bool MyMod::disable() {
    getSelf().getLogger().debug("Disabling...");
    return true;
}

} // namespace my_mod

LL_REGISTER_MOD(my_mod::MyMod, my_mod::MyMod::getInstance());
這段代碼做了什麼:
getLogger().info(...)向服務器控制台輸出一行,並標上模組的名字。emplaceListener訂閱一個事件。模組被禁用時,LeviLamina 會自動移除監聽器。getOrCreateCommand創建/hello;CommandPermissionLevel::Any允許所有玩家執行(GameDirectors則只允許管理員)。overload().execute(...)添加不帶參數的/hello重載,以及執行時運行的代碼。
遊戲類型沒有 RTTI
Minecraft 編譯時沒有運行時類型信息,因此不能對它的類使用 dynamic_cast。請先檢查類型(就像這裡的 isPlayer()),再使用 static_cast。
再次運行 xmake 構建。你應該再次看到 build ok。
6. 在服務器上加載模組
-
如果服務器正在運行,先停止它。
-
把
bin\my-mod文件夾複製到服務器的mods文件夾,得到D:\servers\survival\mods\my-mod\my-mod.dll:powershellCopy-Item -Recurse -Force bin\my-mod D:\servers\survival\mods\ -
按開你的第一個服務器中的方式啟動服務器,或在服務器文件夾中運行
lip run。 -
在 LeviLamina 加載模組的幾行之後,你應該看到一行帶有
[my-mod]和Hello from my first mod!的輸出。 -
在服務器的輸入行中輸入
hello(控制台命令不帶/)。你應該看到Hello, console!。 -
從 Minecraft 加入服務器(地址
127.0.0.1,端口19132),在聊天欄輸入/hello。你應該看到Hello, <你的名字>!。
以後每次修改:停止服務器,運行 xmake,重新複製文件夾,啟動服務器。
模組沒有加載時的錯誤碼
如果 LeviLamina 沒有加載 my-mod,而是報告 126 或 127 之類的錯誤,通常是因為模組所用的 LeviLamina 版本與服務器的不同。請檢查第 3 步固定的版本。LeviLamina 故障排除解釋了這些錯誤碼。
你現在有了什麼
- 一個存放模組的 Git 倉庫,可以用
xmake構建。 - 一個輸出日誌並註冊命令的模組,已被你的服務器加載。
lip.toml和.github\workflows\中的發佈工作流,可以隨時發佈。
下一步
- 讓別人用一條命令安裝你的模組:用 lip 發佈你的模組。
- 包含配置文件、數據庫、表單和物品的更完整示例:ShrBox/ExampleMod。
- 帶參數的命令:命令指南。
- 響應玩家的行為:事件指南。
- 用對話框詢問玩家:表單指南。
- 改變遊戲的行為:Hook 指南。
- 所有類和函數:LeviLamina API。
- 開發者常見問題:開發者 FAQ。
- 更想用腳本語言:你的第一個腳本插件。